Trailer lights not working? Here are some diagnostic and repair methods for dim or non-functional trailer lights. Most repairs are quick and simple.
Tools required:
4-in-1 screwdriver
Continuity tester
Jumper wire
Nut driver
Towing vehicle tester
Materials required:
220-grit sandpaper
Electrical contact cleaner
Replacement bulb
Wiring kit
Keeping your trailer lights wired correctly is essential for safe towing. If your utility trailer is starting to show its age, chances are that your trailer lights are having issues. Properly functioning trailer lights are a necessary condition for safe towing, so it is important to check them each time you use your trailer. Some issues, such as a burned-out bulb or a bad trailer ground, can be easily fixed, while others can be more difficult to diagnose and repair. Follow the steps in our photo sequence to keep your trailer lights in top condition.
Troubleshoot your vehicle using a tester.Check your vehicle system by plugging in a towing vehicle tester into the vehicle’s connector to ensure that the trailer light wiring system is functioning properly. There are two types of trailer wiring testers. Check the configuration of your vehicle’s plug. Attach the trailer and connect the trailer light harness. Have an assistant step back and check that the running lights, brake lights, and turn signals are functioning properly. If all the lights appear dim or don’t work at all, check the trailer light harness on the towing vehicle. First, disconnect the harness and insert the tester into the vehicle’s socket. If there is a problem with your car or truck’s trailer light wiring, the tester will immediately tell you. If the tester indicates a problem, check all the vehicle’s lights to make sure there are no blown fuses, damaged flashers, or burned-out bulbs. Clean the connectors and recheck. Check for any broken wires near the connector. If there are still issues, schedule a wiring check. If the tester’s lights are functioning properly, then the problem is with the trailer lights or wiring harness, and you will need to perform some troubleshooting on the trailer lights.
Clean both connectors and trailer light wiring connectors by using a specific cleaner. If the trailer lights are still dim or not lit after checking the towing vehicle, please clean the connector plugs with an electrical contact cleaner and a fine steel wire brush to clean the contact pins.
Inspect the grounding of the trailer light wiring. Clean grounding contacts and secure the grounding wire to the metal frame. The ground wire often causes the issue. Remove the grounding screw, use sandpaper to polish wire terminals and trailer chassis contact points. If the grounding screw is corroded, replace it.
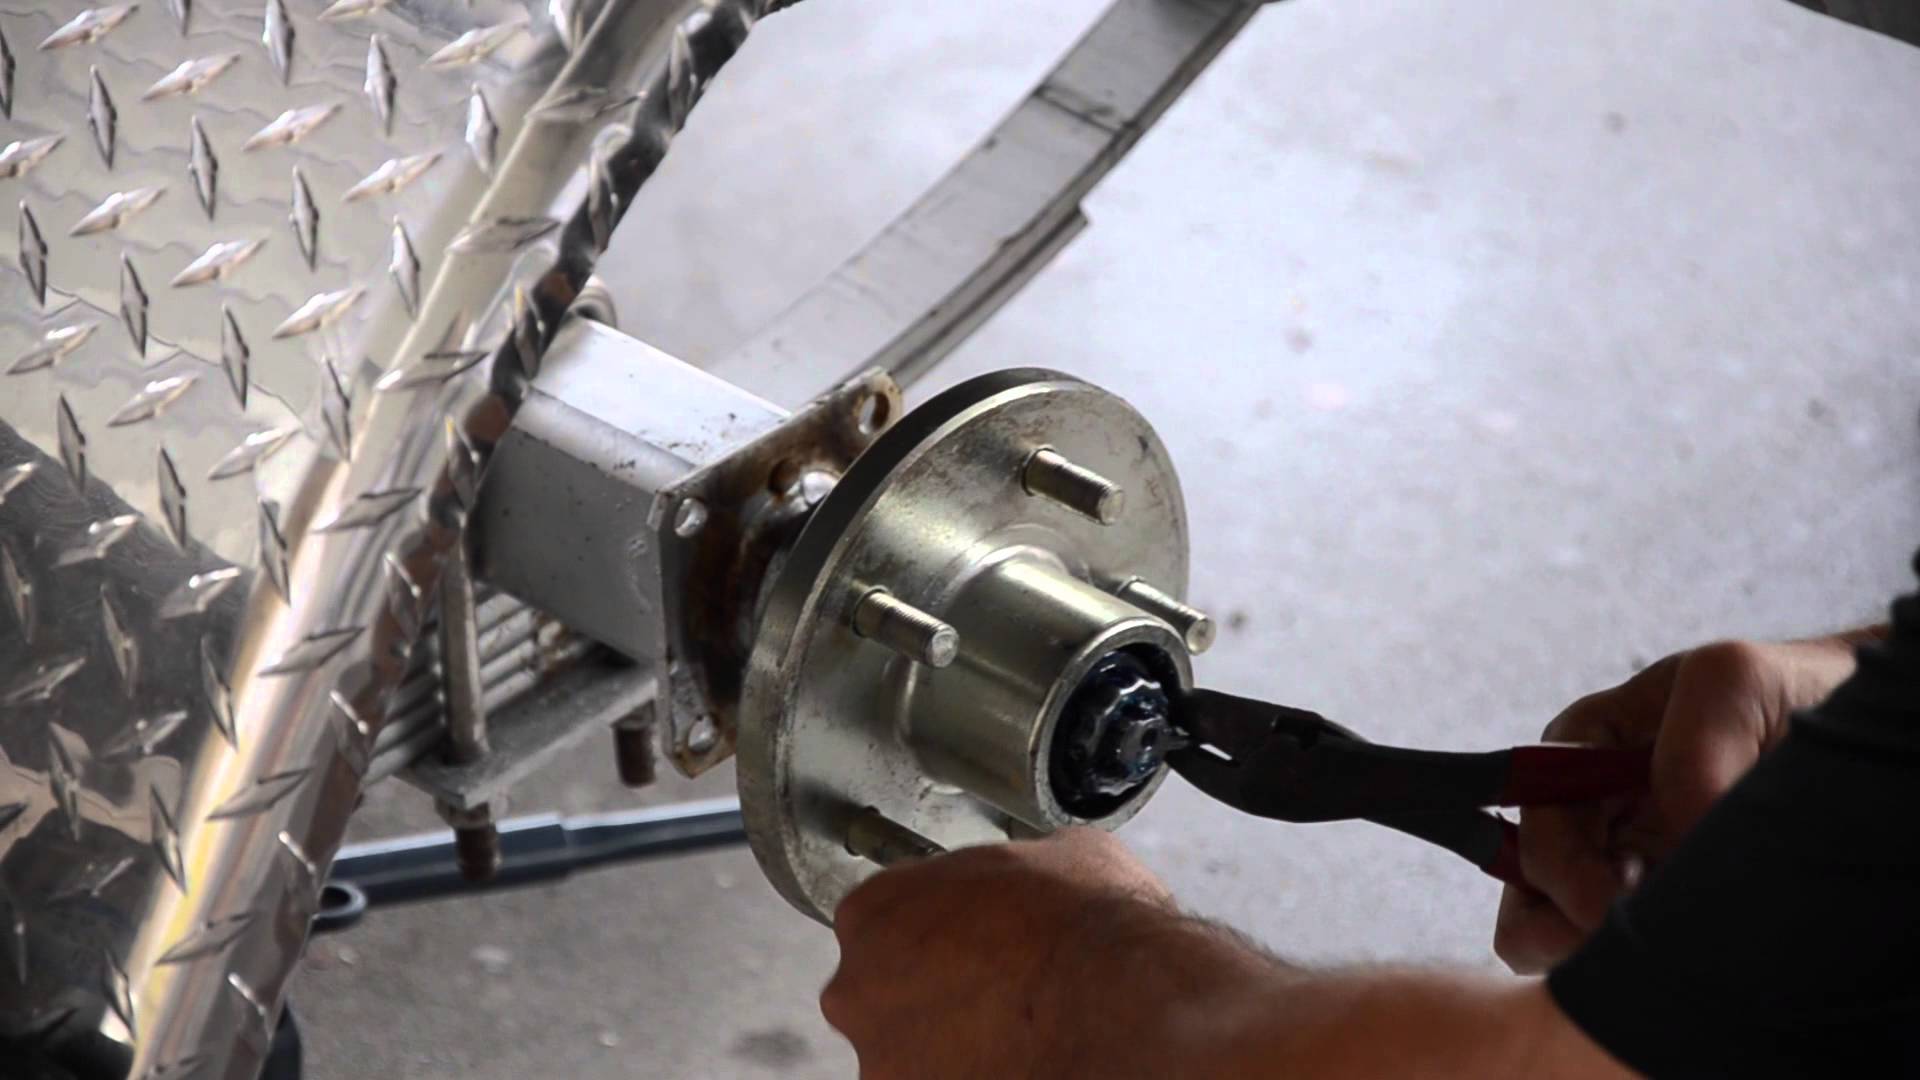
Replace faulty light bulbs. Gently twist off the old light bulb, install a new one, and check the light. If it’s successful, you can proceed.
Clean corroded sockets with fine sandpaper and a 3/8-inch dowel to remove corrosion. If the light still doesn’t work, the socket’s contact points may be corroded. Apply a small amount of insulating grease to the contact points and insert the light bulb. If the light still doesn’t work, check the installation bolts and scrub off corrosion if necessary.
Solution to malfunctioning trailer lights: Perform continuity testing
To inspect the wiring of a trailer, a continuity test may be carried out using a jumper wire connected to the connector pins and a continuity tester attached to the socket. The jumper wire can be connected to one of the pins of the trailer socket.
Continuity tester.A continuity tester comprises a light bulb and a battery, and serves to indicate a good circuit by lighting up the bulb.
Jumper wire.The alligator clip at the end of a wire allows for rapid and effortless continuity connection. If one side of the light fails to illuminate, a possible cause is a broken wire. To detect a break, examine the color of the wire attached to the socket, locate the corresponding wire on the connector, and clip one end of a long jumper wire (photo 2) to the connector pin, with the other end clipped to the continuity tester. Probe the inside of the socket with the tester (the color of the wire connected to the internal socket can be observed). If the bulb does not light up, track the wire and check for bare or broken spots. If a break is identified, sever the wire at the break, solder a new connection, and use heat shrink tubing to repair the insulation; such tubing can be obtained at a hardware store.
Replace trailer light wiring.If the corrosion is severe, replacing the entire wiring system is recommended. In cases where all previous attempts have failed and the parts exhibit severe corrosion, a new wiring harness can be purchased for approximately $20, which includes connectors, lights, lenses, and comprehensive instructions.
0 comment
The sound of the raindrops hitting the roof is so calming to me.
I appreciated the section on how to rewire a trailer from scratch. This can be a daunting task, but the article provided some great guidance on how to do it properly.
I found the section on how to diagnose and fix electrical problems with trailer lights to be particularly helpful. This is a common issue that many people struggle with, and the article explained it in an easy-to-understand way.
Holy guacamole, I never knew how much I needed to know about safe sauna transportation until now.
Well, butter my biscuits, I’m actually getting into these tips for changing my own oil.
As someone who owns a boat and a utility trailer, this article was incredibly helpful in showing me how to repair both when they’re damaged. I feel more confident in my ability to handle any issues that may arise.
The rain is a great excuse to cozy up inside with a good book.
I appreciated the emphasis on safety in the article. Damaged boats and malfunctioning trailer lights can be dangerous, so it’s important to take care of them as soon as possible.
Today is the perfect day for exploring new places and trying new things.
Well, I’ll be a horse’s patoot, I never thought I’d be so invested in performing maintenance on trailers.
This article provided great tips and insights on how to repair damaged boats and wiring for utility trailer lights. It’s important to have this knowledge when something goes wrong, and the article explains everything well.
The feel of the sand between my toes is just what I need to feel grounded.
The article provided some great tips on how to prevent damage to your boat and trailer in the first place. It’s always better to avoid a problem than to have to fix it.
The article provided some great information on the tools and materials you’ll need to repair damaged boats and wiring for trailer lights. This can be helpful for those who are new to this kind of work.
The article provided some helpful tips on how to avoid common mistakes when repairing damaged boats and wiring for trailer lights. This can save you time and money in the long run.
I found the section on fiberglass repair for boats to be particularly helpful. It’s a complex process, but the article broke it down into easy-to-follow steps.
I appreciated the detailed explanations and step-by-step instructions in the article. It made the process of repairing damaged boats and wiring for utility trailer lights much easier to understand.