
In decades past, the July/August edition of Family Handyman predominantly featured projects centered around yard sheds. However, this year marked a departure from that tradition as we embraced a new challenge, inspired by a mere daydream.
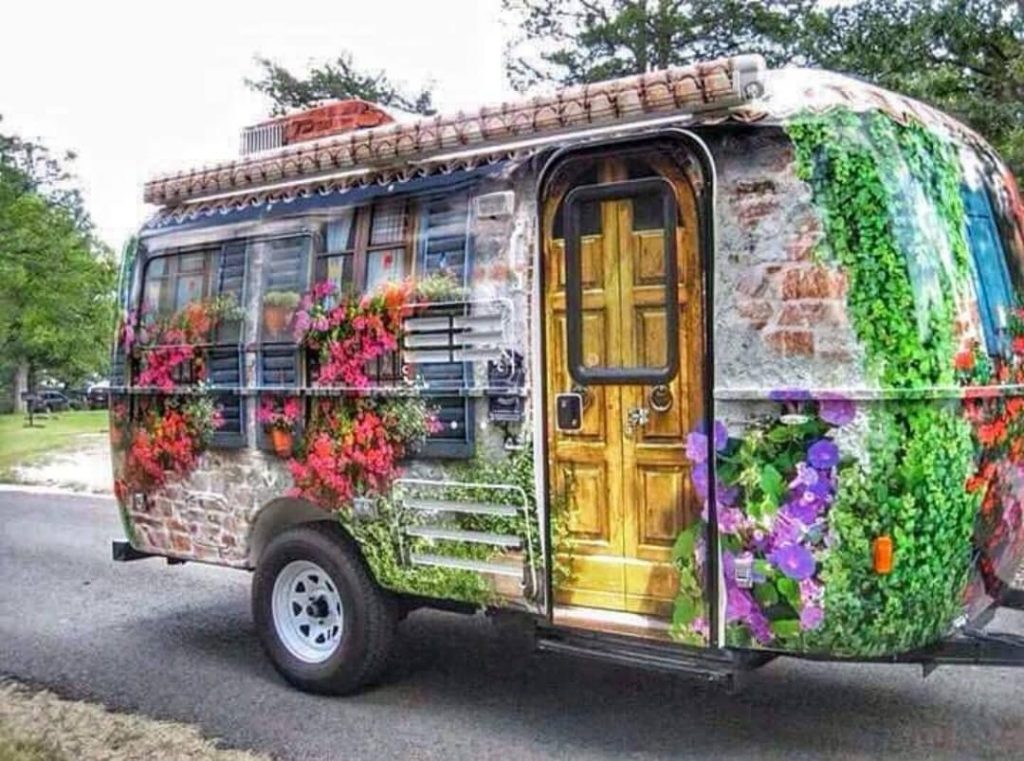
Have you ever looked upon a neglected, aged item and envisioned its potential transformation? This sentiment encapsulates our initial encounter with the camper. Disregarding the dents, rust, flat tires, and dulled aluminum, we set our sights on a vision of a meticulously restored trailer gracefully traversing the roads—a resplendent mobile exhibit destined to captivate onlookers. Moreover, we envisaged the liberating concept of a home on wheels, providing the freedom to roam anywhere, anytime—an ode to independent travel. Speaking of independence, presented herein are 10 vintage camping hacks essential for every avid camper.
Nevertheless, such freedom comes at a considerable cost. A new camper of comparable size commands a minimum price of $20,000, often exceeding twice that amount. In contrast, we acquired this vintage gem for under $7,000 and invested a comparable sum in its restoration—an economically sound decision.
Yet, the true triumph extends beyond mere financial considerations. We achieved a harmonious blend of the past and the present—a thoroughly rejuvenated camper exuding a distinctive vintage flair. Alongside its aesthetic appeal, the restored camper now embodies a tangible piece of history, commanding attention on the open road and within campsites alike.
A Shift in Strategy
Initially, our primary objective was to restore the aluminum exterior to its original luster. Consulting with experts, we amassed an array of polishing equipment and commenced our experimentation. While we achieved a mirror-like shine, progress proved unacceptably slow, posing a challenge to our timeline.
In pursuit of an alternative, we sought a paint solution capable of forming a resilient, glossy surface. The optimal answer surfaced in the form of alkyd paint. While water-based acrylic paints are generally favored for most do-it-yourself (DIY) projects, traditional oil-based alkyds demonstrated superior leveling properties and the ability to form a more robust film.
Considering the potential mess associated with spraying paint in our workspace, we opted for a rolling technique. The results surpassed our expectations and offered a distinct advantage over spraying— the subtle texture imparted by the roller effectively concealed minor dents and scratches.
Contemplating methods to eliminate old paint and rust led us to consider sandblasting initially. However, this process necessitates a sizable air compressor and results in substantial airborne dust. Consequently, we explored the option of “vapor blasting.”
Similar to sandblasting, vapor blasting subjects a surface to abrasive media, but it relies on water from a pressure washer instead of air, mitigating the mess and utilizing a commonly available tool. Our experimentation with a generic pressure washer vapor blasting kit ($30 online) yielded valuable insights:
- Match the gun to your pressure washer, considering varying sizes and specific psi ratings. The pressure washer’s psi rating must align with the kit’s recommended range. Our initial purchase, priced at $120, proved too large and incompatible with our 2,700 psi pressure washer.
- A higher psi rating for the pressure washer yields more effective results. While our 2,700 psi machine was functional, it exhibited slower progress. Opting for a system within the 5,000 to 7,000 psi range would significantly expedite the process.
- The type, weight, and size of the blast media significantly impact outcomes. We experimented with three varieties before discovering that coarse coal slag from Tractor Supply Co. ($8.99 for 50 lbs.) effectively met our requirements.
Mitigating ‘Flash Rust’
The preparation of steel surfaces for painting entails considerable effort, and it is crucial to be aware of a potential issue: Moisture in the air can swiftly induce “flash rust” on exposed steel, even if not immediately visible. This latent rusting can become problematic after the application of paint. To preemptively address this concern, we promptly wiped down all surfaces with denatured alcohol and subsequently applied a black rust conversion primer.
Preparing Aluminum for Paint
The condition of the camper’s aluminum surface was notably grim. To ensure the longevity of our paint job, a thorough cleaning was imperative. Despite experimenting with soap and water, TSP, and muriatic acid, none proved effective against the decades of exposure the camper had endured.
JJV’s Best Aluminum Cleaner ($42 online), designed for cleaning aluminum watercraft, emerged as a highly effective solution for preparing the aged, anodized aluminum for painting. This process was facilitated by employing two individuals. Using a spray bottle, we applied the cleaner at full strength, allowing it to sit for 10 minutes. Subsequently, employing an industrial scrub brush, we systematically worked the cleaner across the surface, adjusting the application where necessary. Finally, utilizing the fine spray setting on the nozzle, we rinsed the surface with water.
Incorporating a Catalyst
Opting for oil-based alkyd paint, chosen for its superior leveling properties and the ability to form a more durable finish than most water-based alternatives, we selected Krylon Farm and Implement paint ($40 per gallon at O’Reilly Auto Parts). To enhance the paint’s durability further and expedite the curing process, we introduced Krylon’s catalyst hardener into the formulation.
Brush, Then Roll
To ensure a uniform texture, we applied paint with an extra-stiff brush featuring natural bristles to areas that might be missed by the roller, promptly followed by a pass with the roller. Given the thickness of the paint, the choice of an extra-stiff brush proved essential.
Quality Rollers are the Key
Investing in high-quality roller sleeves is paramount. While they may incur additional costs, the smoother results they yield make the expenditure worthwhile.
Painless Riveting
Upon the completion of the paint curing process and the subsequent reinstallation of nameplates and decorative elements, we employed POP rivets, also known as blind rivets. POP rivets consist of two components—the “hat” and the “mandrel.” Inserted into predrilled holes, these rivets are set using a rivet gun. The gun pulls the mandrel through the hat, causing the end of the mandrel to mushroom, after which it is sheared off, leaving only the rivet head visible.
The length of the rivet holds significance, requiring it to be twice its width plus the thickness of the material. For instance, when utilizing 1/8-inch rivets to join 1/4-inch material, the rivet should measure 1/2 inch in length. While handheld rivet guns are commonplace, we found the Milwaukee M12 battery-powered rivet gun to be exceptionally convenient, accommodating various rivet sizes and allowing for single-handed use. Although the bare tool comes at a cost of $230, it significantly eases the manual strain associated with riveting.
Endless Exterior Details
Numerous enhancements were made to the exterior, including the upgrade of all lights to energy-efficient LEDs, restoration of nameplates, and the installation of a toolbox in the trailer’s tongue. Notably, the whitewall tires, despite costing four times as much as blackwall trailer tires, stand out as a favorite detail, justifying their expense with a timeless aesthetic.
Clever Cooler Slide-out
With the removal of the camper’s old refrigerator, rendering its access and venting door redundant, we repurposed the space by constructing a lidded box/table just inside the door to accommodate a cooler. Mounted on heavy-duty 32-inch drawer slides, the cooler platform allows for easy access without the need to lift a cooler full of ice or step inside to retrieve a fresh beverage—simply open the door and pull the cooler outside.
Custom Decal
Despite our strong inclination towards DIY endeavors, we opted to subcontract the creation of our camper’s name badge. The production of both front and rear decals incurred a cost of approximately $200.
Nonslip Stair Tread
An effective method for introducing a nonslip surface to various surfaces, this straightforward technique, initially acquired during the fabrication of skateboards utilizing epoxy and clear grit, proved instrumental for enhancing the safety of our camper’s steps. In this instance, we applied POR-15 OEM Bed Liner coating to the stair tread, followed by a sprinkling of residual coal slag from the vapor blasting process. This approach involved the rolling of the bed liner onto the tread, subsequently applying the coal slag on top. Additionally, explore these 15 remarkable camping gadgets available on Amazon.