• Detailing
  • Motorcycle
  • Parts
  • Truck
  • Utility Trailers
  • Blog
Auto Motivex
keep your memories alive
Motorcycle

Fortified Security: 14 Unyielding Locks Resistant to Bolt Cutters and Other Shed Protection Solutions

by auto_motivex November 12, 2023
written by auto_motivex

Safeguard against victimization by preemptively thwarting thieves attempting to pilfer trailers, motorcycles, ladders, and equipment from your premises. Utilize locks impervious to bolt cutters and other shed security products to fortify your defenses.

Overcoming the Threat of Bolt Cutters

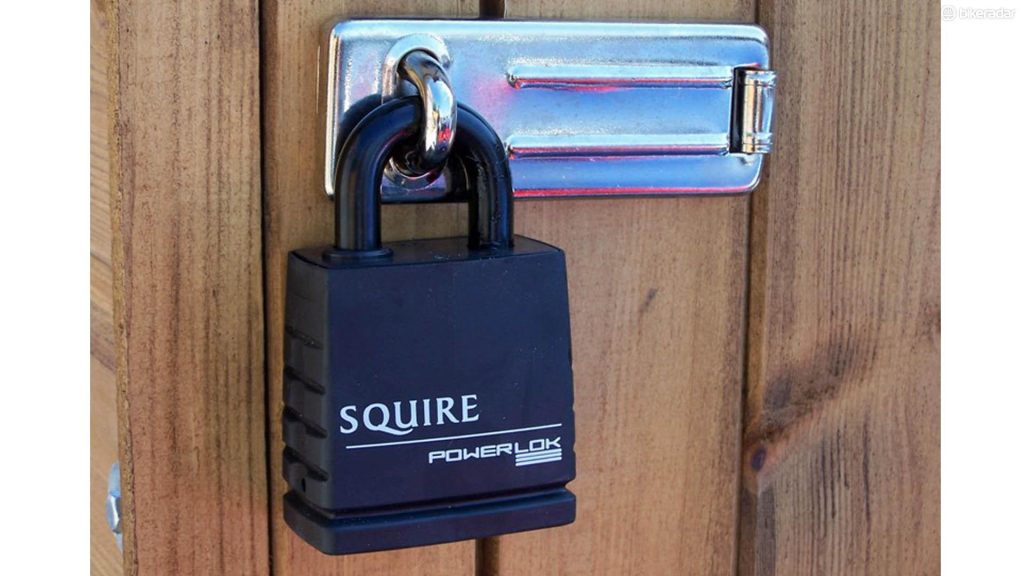
Halting the endeavors of thieves necessitates diligence. According to Justin Matuszek of Master Lock, “A determined thief armed with an angle grinder and sufficient time can breach nearly any lock. However, more commonly, thieves wield bolt cutters, aiming for expeditious theft.”

Matuszek emphasizes that a lock’s resistance to bolt cutters is influenced by the thickness of its shackle and the degree of exposure. Moreover, the type of locking mechanism employed plays a pivotal role in the susceptibility of a lock to picking. Both the Master Lock Magnum keyed padlock and the Master Lock ProSeries Combination Lock demonstrate resilience against bolt cutters.

Enhanced Security with Ball-Bearing Locking Mechanisms

Padlocks featuring ball-bearing locking mechanisms exhibit heightened resistance to prying attempts. Those constructed from boron, being 50 percent harder than hardened steel, prove more formidable in deterring thieves.

Thwarting Thieves through Welded Eye Bolts

Integrate a welded eye bolt into the framework of your garage by securing it through one of the studs. Employ a chain or cable lock to fasten your ladder or boat to the eye bolt, thereby impeding swift theft attempts and deterring potential wrongdoers.

Optimal Chain Design: Hexagonal or Square Links

A robust, hardened steel chain featuring hexagonal links serves as an effective deterrent against the majority of thieves armed with bolt cutters. The geometric design of hexagonal links (or square or trapezoidal) renders it impractical for bolt cutters to gain a sufficient grip.

While chains available by the foot at local hardware stores excel in tasks such as lifting and towing, they often fall short in terms of theft resistance. Even those of substantial thickness typically utilize round links, and if a hardware store clerk can effortlessly cut through the chain, so can a potential thief.

Vulnerabilities of Inexpensive Chains

Inexpensive chains, cables, and padlocks, up to 3/8 inch thick, succumb easily to a $20 bolt cutter. A Grade-43, 3/8-inch high-test, hot-dipped, galvanized zinc link from a home center was severed in a mere five seconds using a standard 24-inch bolt cutter. Chains of this caliber are unlikely to impede thieves and may pose minimal resistance.

Swift Erosion of Low-Quality Cable

A 24-inch bolt cutter can swiftly sever a 5/8-inch vinyl-coated, flexible, braided, steel cable in under 60 seconds. Though the cable requires a bit more time to cut compared to a solid chain, it lacks the clean severance of its sturdier counterpart.

Bike Cuffs for Enhanced Security

An invaluable suggestion from a retired police officer for safeguarding bicycles involves using a pair of handcuffs. This method allows for the secure locking of both the bicycle and its wheels. A single set of cuffs can accommodate two bikes or be employed to physically restrain a bike frame to various anchor points. Handcuff keys are compact and easily portable, and standard cuffs crafted from durable steel are cost-comparable to bulky bike locks.

Master Lock Street Cuffs Lock, highly acclaimed by users, incorporate pivoting links to thwart thieves attempting leverage with a bolt cutter. Their compact size enables convenient pocket carriage.

Enhancing Security through Audible Deterrents

Deter potential threats to valuable assets such as motorcycles and trailers by incorporating audible alarms into cable locks and ensuring the overall security of your garage. Additionally, deploy alarms on gate latches, shed doors, and garage entrances to fortify your perimeter.

A plethora of alarm options are available, including movement sensors that can be mounted on doors and strategically angled to cover windows. Numerous do-it-yourself (DIY) alarm systems exist, ranging from battery-operated to ultrasonic (key fob) and solar-operated variants. Notably, the FJM Security SX-776 Cable Lock Alarm emits a piercing shriek upon the detection of a cut in its 24-inch retractable cable.

Integration of Eye Bolts into Concrete Projects

When undertaking concrete projects such as new steps, driveways, patios, or footings, consider embedding an eye bolt in the concrete for added security. Position the eye loop to avoid interference with daily foot or vehicle traffic, opting for a welded loop for durability. This strategic placement serves as a secure anchor point for attaching trailers, generators, motorcycles, grills, bikes, and other valuable items. Stainless steel and galvanized eye bolts are readily available at home centers and marine suppliers, often used in dock construction. For those averse to permanent concrete piers, screw-in ground anchoring products offer a viable alternative.

Enhancing Shed Security with Secure Fasteners

While a locked shed may appear secure, resourceful thieves can circumvent standard locks by using a screwdriver to dismantle hinges and other hardware featuring exposed screw heads. Thwart such attempts by employing Allen-head, Torx-head, or hex-head cap screws instead of conventional Phillips-head screws. Alternatively, tamper-proof security screws, requiring specialized removal tools, can be procured to further enhance security. It is essential to acquire the corresponding special bits or tools for effective implementation.

Securing Shed Door Hinges: Two Approaches

Typically, shed doors swing outward, rendering hinge pins vulnerable from the exterior. Exploiting this vulnerability, a thief can effortlessly dislodge the pins and detach the door. To counteract this method of unauthorized entry, consider two effective strategies. Firstly, invest in security hinges equipped with tamper-proof pins and a locking tab to fortify your shed’s entrance. Alternatively, retrofit an existing hinge by removing the center screws on both sides. Insert a finish screw through one side, allowing it to protrude approximately 1/4 inch. Modify the receiving hole on the opposite side so that, when the door is closed, the finish screw head engages the corresponding hinge. This adjustment ensures that even if the hinge pin is removed, the door remains securely attached.

Enhancing Security for Alloy Wheels

The prevalence of late-model vehicles featuring alloy wheels and low-profile tires, characterized by a reduced distance between the rim and tread, has resulted in an increase in bent alloy wheels. With factory replacements costing over $300 each, vehicle owners often turn to used wheels from recycling yards, creating a shortage of available used alloy wheels. Consequently, the surge in demand has led to a corresponding rise in alloy wheel theft, with reports indicating that thieves can strip all four wheels from a vehicle in approximately five minutes.

To counteract this trend, vehicle owners with alloy wheels are advised to install locking lug nuts as a deterrent against theft. While acknowledging that locking lug nuts are not infallible, their specialized socket requirement adds a layer of complexity, slowing down potential thieves. As a precautionary measure, replace one standard lug nut on each wheel with a locking nut. For enhanced security, the installation of two locking nuts per wheel is recommended.

Enhancing Trailer Security Measures

Frustrate trailer thieves by steering clear of conventional coupler “latch locks,” which prove easily penetrable with even the most modest bolt cutters, allowing perpetrators to abscond with your trailer in mere moments. For a robust defense, opt for a coupler lock that poses a genuine challenge to would-be thieves. This entails inserting the ball into the coupler and sliding on the U-bracket. Unless there is ample time to dismantle the entire coupler and replace it, this approach effectively thwarts the majority of theft attempts.

Furthermore, ensuring the correct and secure hitching of your trailer in the first instance is paramount.

Enhancing Security for High-Value Trailers

For trailers of significant value, an additional layer of protection is recommended through the utilization of a “boot”-style lock in conjunction with the coupler lock. Various styles are available, but a notable choice is a model that serves dual purposes, functioning not only as a secure wheel lock but also as a wheel chock to prevent unintended trailer movement. Simply slide the lock onto the wheel and engage the lock cylinder to fortify the trailer’s overall security.

November 12, 2023 0 comment
0 FacebookTwitterPinterestEmail
Parts

Utility Vehicles: A Vital Component in a Landowner’s Arsenal

by auto_motivex November 11, 2023
written by auto_motivex

Some of my preferred implements extend beyond the confines of a toolbox or the surface area of a workbench. Subcompact tractors, renowned for their versatility, serve as indispensable workhorses for landowners. However, for those managing extensive acreage, the inclusion of a utility vehicle, and perhaps even a brush cutter, in their toolshed merits consideration. This discourse aims to provide essential insights into the realm of utility vehicles.

Utility Vehicles Possessing

capabilities akin to small pickups but accompanied by a considerably higher enjoyment quotient, utility vehicles (UTVs) are experiencing a surge in popularity among landowners across the nation. One could liken them to matured versions of four-wheel ATVs.

Utility vehicles boast the capacity to transport up to six passengers while concurrently facilitating a myriad of work-related tasks. Admittedly, their larger size renders them more challenging to store and tow compared to compact ATVs. Nevertheless, for individuals overseeing expansive land holdings, the acquisition of a UTV proves to be a venture worthwhile.

Drawing upon my extensive experience in assessing various UTV models, I recently incorporated a Polaris Ranger 570 NorthStar into our greenhouse project. The ensuing narrative elucidates the insights gleaned from this experience.

If you possess the skills to operate a car or truck, navigating a UTV should present no challenge. UTVs excel on the ease-of-use spectrum, equipped with features such as power steering, gas and brake pedals, automatic transmission, and seat belts, mirroring the controls of a standard truck.

While mastering the response characteristics of a UTV’s belt-drive continuously variable transmission (CVT) may require some time, understanding nuances such as the engagement point (the degree of foot pedal movement required for the vehicle to initiate motion) is a skill that develops with experience.

The advantages of a CVT are noteworthy—automatic adaptation to optimal gear ranges for diverse situations, coupled with the flexibility for performance enhancements using aftermarket components, thanks to the straightforward belt-and-pulley design. The driver can effortlessly toggle between high and low-range gearing, in addition to engaging reverse.

It’s worth noting that not all UTVs utilize a belt-drive CVT. The Honda Pioneer 1000 UTV, for instance, is equipped with a distinctive six-speed automatic dual-clutch transmission that offers a manual paddle-shift option. This transmission, while resistant to slipping in muddy or wet conditions compared to a belt drive, is mechanically more intricate. On the other hand, Kubota UTVs, consistent with the company’s compact tractors, adopt a hydrostatic transmission.

In the initial stages of our greenhouse construction project, the Polaris Ranger 570 NorthStar proved its utility by efficiently loading the cargo bed with gravel for our foundation. Notably, this UTV boasts a cargo-carrying capacity of up to 500 lbs., facilitated by the bed’s gas-assist lift mechanism, ensuring effortless unloading.

Benefiting from a compact wheelbase and an impressive turning radius, the vehicle facilitated the easy transportation of tools, lumber, and materials to the work site. A noteworthy feature that I particularly appreciate is the TurfMode rear differential, which, with a simple button press, enables the unlocking of the rear differential, transforming the UTV into a one-wheel-drive configuration. This feature proves invaluable when traversing delicate areas where the use of aggressive tires could cause undesired disruption.

The Polaris Ranger 570 is propelled by a fuel-injected four-stroke gas engine, generating a reported 44 horsepower (hp). While UTVs with more robust engines are readily available and may be preferable for tasks such as towing a boat and trailer or navigating mountainous terrain with a work crew, it’s worth noting that manufacturers like Bobcat, Kubota, Kawasaki, and John Deere also offer diesel-powered UTVs—an attractive option for owners of diesel tractors or other equipment. Additionally, Polaris has recently introduced the industry’s inaugural electric UTV, although it was not in production at the time of this evaluation.

The true value of a UTV becomes apparent when navigating challenging terrains. This UTV, along with many of its counterparts, features standard on-demand all-wheel drive. Bolstered by 11 inches of ground clearance and a four-wheel independent suspension, the Ranger confidently traverses rugged landscapes. Whether engaged in fence work, accessing a tractor in the field, or reaching remote locations, a UTV stands out as an ideal choice. Moreover, it offers the familiar conveniences of an on-road pickup, including passenger seats, power steering, a cab enclosure, and more, all adapted for off-road settings.

For those seeking unparalleled off-road capabilities, the Can-Am Defender with six wheels, an 82-hp V-twin engine, six-wheel drive, and a locking differential warrants consideration. UTVs, especially those measuring 60 inches in width or less, are well-suited for public-access off-road trails, with legal road access in many states, contingent upon local regulations.

Customization plays a pivotal role in tailoring your UTV to meet specific needs. Accessories such as winches, cab enclosures with windows and windshield wipers—found on this Polaris Ranger 570 NorthStar—are available as add-ons for various UTV models. While many accessories cater to recreational users, such as rifle cases for hunters or specialized tires and engine-performance kits for sport riders, numerous options enhance utility for work-related tasks. Light bars, utility light choices, snowplows, powered snow blowers, heavy-duty bumper kits, brush guards, cargo racks, and tool holders expand the functionality of UTVs, facilitating tasks ranging from towing log splitters or chippers to maintaining turf-covered acreage with pull-behind mowers or leaf vacs.

DR Power Brush Cutter

During the construction of our Getaway cabin last summer, we encountered a common challenge faced by many landowners—dealing with overgrown brush that exceeded the capacity of a lawn mower yet was too small for a chainsaw. The extent of the task necessitated the utilization of the Pro Max34 DR Power Brush Cutter.

Fueled by a Briggs & Stratton engine featuring an electric start, the Pro Max34 boasts the appearance of an enlarged lawn mower. This walk-behind unit is equipped with straightforward handlebar controls for engaging the cutting blades and activating the self-propulsion drive system.

The targeted area for clearance predominantly comprised weeds and saplings. The Pro Max34 is designed to cut weeds and brush up to eight feet in height and saplings with a thickness of up to three inches. While our weed growth did not reach such heights, we did put the machine to the test with saplings on the larger end of the spectrum. The Pro Max34, equipped with a single cutting blade, effortlessly sliced through our vegetation. Its two 18-inch tires smoothly navigated over roots and stumps, aided by the mower deck’s seamless glide on steel rails.

For individuals faced with the challenge of eliminating weeds and unruly growth, a brush cutter such as the Pro Max34 may prove to be a suitable solution.

November 11, 2023 0 comment
0 FacebookTwitterPinterestEmail
Parts

Toilet Components: Identification and Troubleshooting

by auto_motivex November 10, 2023
written by auto_motivex

Learn how to troubleshoot and repair various components of your toilet, including flappers, fill valves, flush valves, and handles.

Introduction

Toilets are equipped with moving parts, and over time, these components can wear out or malfunction. If you’re dealing with a running toilet that won’t stop, it’s worthwhile to address or replace key toilet parts. In this guide, we provide insights into repairing or replacing essential toilet tank components. While the interior of your toilet and its parts may not appear pristine, with surfaces marked by scum, water stains, and corrosion, rest assured that the water within is as clean as what flows from your faucets.

Tools Required:

  • 4-in-1 screwdriver
  • Adjustable wrench
  • Bucket
  • Locking pliers
  • Pliers
  • Shop vacuum
  • Tape measure

Materials Required:

  • Fill valve
  • Flapper
  • Toilet handle and retaining nut
  • Valve washer

Identifying the issue with a running toilet is typically straightforward. A toilet may run continuously if the fill valve, responsible for allowing water into the tank, fails to close entirely. On the other hand, intermittent running may occur when the flapper valve opens slightly for a few minutes. In both scenarios, it is essential to diagnose why the fill valve is not halting the water flow and whether any damaged toilet parts require attention.

Step 1: Look for Leaks

Examine the toilet for leaks around the tank bolts or toilet flush valve. If leaks are present, it is likely necessary to remove the toilet tank from the bowl for the replacement of tank bolts, rubber washers, and gaskets on the flush valve. Tighten the locknut if leaks are observed around the fill valve. Cracks in the tank can also be a source of leaks, requiring the installation of a new toilet for a reliable solution.

Step 2: If No Leaks Are Found, Lift Off the Tank Cover

The main components of a toilet tank are the flush valve, responsible for water release during flushing, and the fill valve, facilitating tank refilling after flushing. When a toilet runs continuously or intermittently, one of these valves is usually the culprit. Examine the overflow tube to determine which valve is causing the issue. If water overflows into the tube, there’s likely an issue with the toilet fill valve. If the water level is below the tube’s top, the flush valve may be leaking, allowing water to trickle into the bowl and preventing the fill valve from closing completely.

Step 3: Adjust the Float

If your flapper valve features a ball that floats at the end of a rod, gently lift the rod and listen for the water shutting off. Adjusting the float may help stop the continuous running. To achieve this, gently bend the float arm downward to apply extra pressure on the toilet valve. For floats without an arm, refer to Step 14, “Adjust the Float” below. Flush the toilet to assess if the adjustment resolves the issue. Some fill toilet valves have a float adjustment screw on top (refer to the image below). If there is no adjustment screw, bend the float arm. For Fluidmaster-style fill valves, ensure proper adjustment without the need to empty the tank.

Step 4: Take Off the Fill Valve Cap

Remove the fill valve cap by pressing down and turning counterclockwise for this specific type of toilet valve. If dealing with other valve types, remove screws as necessary.

Step 5: Flush the Valve with Water

Cover the flapper valve with your hand, turn on the water cautiously to avoid splashing, and let it flush out the toilet valve for a few seconds.

Step 6: Replace the Washer

Upon removing the cap to flush out the valve, carefully inspect the washer for wear or cracks. If the washer is worn or cracked, replace it by prying the old washer out of the cap with a small screwdriver and pressing the new one into place. While replacing a damaged washer is cost-effective and straightforward, identifying the correct washer may pose a challenge. Common washers are typically available at home centers and hardware stores. It’s worth noting that professional plumbers often opt to replace the entire fill valve instead of searching for a specific washer.

Step 7: To Replace the Fill Valve, Start by Removing the Water from the Tank

  • Turn off the water at the shutoff valve.
  • Flush the toilet and hold the flush valve open to drain the tank.
  • Sponge out the remaining water or vacuum it up with a wet/dry vacuum.

If you don’t have a shutoff valve, turn off the water supply at the main shutoff valve where water enters your home. This presents an opportune time to install a shutoff valve next to the toilet or replace a leaking one. It’s also an ideal moment to upgrade the supply line feeding your toilet.

Step 8: Remove the Coupling Nut

Unscrew the coupling nut that connects the supply line, ensuring that the toilet valve is held in place inside the tank to prevent it from turning. For added stability, use a locking pliers to secure the base of the toilet valve. It’s advisable to place a towel on the floor underneath to catch any water that may drain from the line.

Step 9: Remove the Old Flapper Valve

Remove the locknut securing the toilet valve to the tank. While unscrewing the nut, gently push down on the valve, then pull out the old valve.

Step 10: Measure the Overflow Tube

Measure the height of the overflow tube, taking the measurement to the top of the tube and not to any water level label on the tube.

Step 11: Twist the Top of the New Valve to Adjust the Height

Adjust the height of the new fill valve by holding the base and twisting the top. The distance from the base to the CL (critical level) mark should equal the height of the overflow tube plus one inch.

Step 12: Install the New Fill Valve

Remove the cap, press down to compress the washer, and screw on the locknut. Reconnect the supply line, flush the valve, and ensure there are no leaks. Finally, reset the cap in place.

Step 13: Cut the Fill Tube to Fit the Angle Adapter

Slide the fill tube onto the fill valve, attaching the angle adapter onto the overflow tube. Adjust the tube to the appropriate length, then affix it onto the angle adapter.

Step 14: Adjust the Float

Turn on the water to fill the toilet tank. Pinch the spring clip and slide the float up or down to set the water level one inch below the top of the overflow tube or align it with the water line marked on the tank. Once the water supply is restored, promptly check for leaks, tightening the nuts if needed.

Step 15: Fixing the Flush Valve – Identifying Issues

Begin by listening for running water after pushing down on the flapper with a yardstick. If the running water sound ceases, the flapper requires replacement. In cases where applying extra pressure on the flapper doesn’t resolve the issue, water may be escaping through a cracked or corroded overflow tube. In such instances, detaching the tank from the bowl and replacing the entire flush valve is necessary. Since problems with the overflow tube are uncommon in causing a running toilet, this repair will not be addressed here.

Step 16: Cleaning the Flapper

Turn off the water supply, flush the toilet to empty the tank, and run your finger around the flush valve seat rim. If mineral deposits are detected, use an abrasive sponge or Scotch-Brite pad to gently clean the flush valve seat. Avoid anything that might roughen it. If cleaning doesn’t resolve the issue, proceed to replace the flapper.

Step 17: Removing the Flapper

Detach the old flapper from the ears of the overflow tube and disconnect the chain from the handle arm.

Step 18: Installing the New Flapper

Attach the new flapper to the overflow tube and link the chain to the handle arm, leaving 1/2-in. of slack in the chain. Ensure the chain has enough slack to prevent tangling or hindering the flapper from closing firmly. Turn the water back on and test-flush the toilet. Note that flapper replacement steps may vary based on your specific type of flapper.

Step 19: Replacing a Broken or Corroded Toilet Flush Handle

Toilet flush handles, prone to loosening or corrosion, can cause ongoing running issues. Removal of the flush handle involves a trick: the retaining nut inside the tank is reverse-threaded. Stand in front of the toilet and turn the nut to the left to loosen it. Once loosened, remove the old handle and lever, insert the new handle, and secure it by threading on the retaining nut. Tighten by turning to the right.

November 10, 2023 0 comment
0 FacebookTwitterPinterestEmail
Detailing

Understanding the Contrast Between Trickle Chargers and Battery Maintainers

by auto_motivex November 5, 2023
written by auto_motivex

In the realm of both automotive and power equipment, a dead battery can swiftly turn a situation sour. This article elucidates how to avert such circumstances by employing a trickle charger.

In my personal encounters, few things rival the exasperation and upheaval caused by a dead battery. One instance that vividly stands out is when my 8,500-watt generator’s battery perished amid an ice storm, leaving us without power for a week.

Given my wife’s remote work setup, the functioning generator was more than just a convenience. Despite owning a full-size 12-volt car battery charger and a portable jump starter, kick-starting this behemoth required the archaic pull cord method. My initial acquisition, subsequent to replacing the battery, was a battery maintainer.

Another vexing episode involved my SUV, plagued by a gradual electrical drain or what’s commonly referred to as a “parasitic draw.” This drain led to the battery dying every five days if the vehicle remained inactive. I resorted to using a trickle charger until discovering that a loose ignition switch was the culprit keeping the vehicle’s power system engaged.

Trickle chargers and battery maintainers serve the common purpose of keeping batteries primed for starting your vehicle or equipment. However, they exhibit distinct features and serve different functions. This article aims to elucidate these disparities and their specific applications.

What Is a Trickle Charger?

A trickle charger is a specific type of device operating on either a six or 12-volt system, delivering low amperage (typically ranging from two to 10 amps). Its primary function is the gradual recharging of a weak or depleted battery.

However, it’s crucial to monitor trickle chargers during use. When the battery attains a full charge, a standard trickle charger continues to supply charge. If left unattended, this continuous charging can lead to overcharging, significantly reducing the battery’s lifespan.

It is advisable to invest in a trickle charger equipped with an automatic self-regulating “float” mode that ceases charging once the battery reaches its full capacity. Alternatively, consider the acquisition of a solar-powered trickle charger, particularly beneficial for camping purposes.

When To Use a Trickle Charger

Trickle chargers are best suited for short-term applications, specifically for keeping a weak battery adequately charged overnight. For instance, they prove effective for vehicles that might remain inactive for approximately a week.

Notably, several devices within a vehicle persistently draw power, powering various onboard computers and control modules even when the vehicle is not operational. These constant draws significantly drain a 12-volt battery. Trickle chargers serve to maintain full battery charge, particularly during freezing nights that tend to deplete the life and voltage of older batteries. Consistently maintaining older batteries at full charge can considerably extend their lifespan.

Moreover, a trickle charger can address issues associated with parasitic draws. For seasonal devices such as boats, RVs, or motorcycle batteries, where a battery maintainer might not be in use, connecting a trickle charger about a week before their intended use can effectively recharge and refresh the battery.

In my personal experience, I have utilized trickle chargers on various battery types, including 12-volt lead-acid car batteries and deep-cycle golf cart batteries. They are also compatible with 12-volt lithium-ion, absorbent glass mat (AGM), and gel-cell batteries.

It’s important to note that trickle chargers are not intended for jump-starting a dead battery.

What Is a Battery Maintainer?

A 12-volt battery maintainer operates akin to a trickle charger but with distinct differences. Typically, it emits an output of one amp or less, solely intended to sustain the charge of a battery. Unlike a trickle charger, a battery maintainer is unable to recharge a battery that is dead or completely depleted.

Its functionality revolves around automatically adjusting the power output to align with the specific needs of the battery. Furthermore, it is designed to forestall overcharging by automatically deactivating once the battery attains full charge, reactivating when a drop in voltage is detected. Unlike a trickle charger, a battery maintainer can remain connected to a battery indefinitely without the risk of overcharging.

When To Use a Battery Maintainer

Battery maintainers are most suitable for extended applications where a consistently charged and healthy battery is essential. They serve well for emergencies, such as ensuring a motorcycle’s readiness for a rare sunny winter day or catering to on-demand power requirements, for instance, with a generator.

Conversely, trickle chargers are better suited for seasonal equipment, including boats, personal watercraft, lawn tractors, as well as vehicles like motorcycles, dirt bikes, ATVs, off-road UTVs, RVs, and classic or custom cars, especially those driven infrequently, just a few times a year. It’s essential to note that trickle chargers are ineffective in maintaining a battery’s charge if the vehicle experiences a parasitic draw, or when confronted with a completely discharged battery.

After a battery has been serviced and brought to a full charge, battery maintainers function compatibly with similar battery types as trickle chargers, with the exception of 12-volt lithium-ion batteries, which exhibit significantly lower discharge rates.

According to technical support from NOCO, a battery maintainer can be employed with an electric vehicle’s 12-volt battery. However, it’s crucial to select one that is specifically compatible with electric vehicles.

November 5, 2023 0 comment
0 FacebookTwitterPinterestEmail
Parts

Unearthing Potentially Valuable Items within Your Garage

by auto_motivex November 4, 2023
written by auto_motivex

Renowned figures Mike Wolfe and Frank Fritz, known as the American Pickers and prominently featured on the History Channel, undertake extensive journeys across the United States, meticulously searching through barns and outbuildings in the quest for secondhand treasures that they can acquire and subsequently sell. Their recent publication, titled “American Pickers Guide to Picking” (Hyperion, $24.99), meticulously details a comprehensive inventory of esteemed brands that hold significant monetary value. Are any of these highly sought-after items hidden within your attic or garage? If so, it is advisable to engage the services of a certified appraiser affiliated with the American Society of Appraisers (appraisers.org).

Bikes: Columbia, Elgin, Gormully & Jeffery, Orient, Star, Victor/Victoria,Schwinn,these bikes are collectible

Bikes are more than mere vehicles; they embody a culture, a lifestyle, and a means of both personal and communal expression. These two-wheeled machines have a rich history and an extensive evolution, from the earliest pedal-powered models of the 19th century to the modern marvels of engineering and design we see today.

In the realm of sustainability, bicycles stand out as an eco-friendly mode of transport, promoting a healthier lifestyle while reducing carbon emissions. This aspect elevates their significance in the context of environmental consciousness and urban planning, as cities strive to create more bike-friendly environments.

Ultimately, bikes are not just a conglomeration of gears and frames; they represent a fusion of history, technology, personal stories, and a commitment to a healthier, more environmentally conscious future. They remain a timeless symbol of freedom, adventure, and human ingenuity.

toys:Dinky, Gottschalk, Gunserman, Keystone, Marklin, Schuko, Steiff, Wilkins, these toys are collectible

Toys also play a pivotal role in the commercial world. They drive industries and markets, shaping the economy while continually adapting to consumer preferences and trends. From globally recognized franchises to local artisanal creations, the toy industry is a vast landscape catering to a diverse range of interests and preferences.

In a broader context, toys are not just objects for play but instruments that contribute to cultural and societal narratives. They signify the universal need for leisure, exploration, and the human inclination towards creativity and innovation. Whether made of plastic, wood, or digitally rendered, toys transcend their physical form to become vessels of joy, learning, and cultural reflection.

cars:Cadillac Roadster, Chevelle, Ford Fairlane and Galaxie, Nash, Plymouth, Rolls-Royce, Studebaker,these cars are collectible

The cultural impact of cars extends beyond their mechanical functions. They are a driving force in art, literature, and media, captivating imaginations and defining eras. From iconic films centered around cars to music and art inspired by their sleek designs, automobiles have become part of the collective human narrative.

Ultimately, cars symbolize not just a mode of transport but an embodiment of progress, individual expression, and cultural identity. They have reshaped societies, economies, and landscapes, and their continued evolution serves as a reflection of our ever-changing world.

Motorcycles:BSA, Excelsior, Flying Merkel, Harley-Davidson, Honda, Indian, Kawasaki,these Motorcycles are collectible

Additionally, motorcycles hold a significant place in various forms of entertainment and art. They feature prominently in films, literature, and art, symbolizing rebellion, freedom, and the allure of the open road. They inspire a sense of adventure and serve as a canvas for creative expression and storytelling.

From a practical standpoint, motorcycles offer an efficient and agile means of transportation, particularly in urban environments. Their smaller footprint and maneuverability make them an attractive option for navigating congested city streets while also offering an exhilarating and engaging way to travel.

Ultimately, motorcycles embody a unique blend of performance, freedom, and individual expression. They are more than a mode of transport; they represent a lifestyle choice, a community, and a symbol of freedom on two wheels.

November 4, 2023 0 comment
0 FacebookTwitterPinterestEmail
Truck

Enhancing Your Power Liftgate: Lubrication Guide and Troubleshooting for a Secure Tailgate Closure

by auto_motivex November 3, 2023
written by auto_motivex

The Power Liftgate, a feature increasingly prevalent in modern vehicles, represents a significant convenience and technological advancement in the automotive industry. This automated system allows for the effortless opening and closing of a vehicle’s rear hatch or tailgate, eliminating the need for manual exertion.

Designed to enhance user convenience, the Power Liftgate is often activated through various means, such as a button on the key fob, a switch on the driver’s console, or a sensor that detects foot motion beneath the rear bumper. This accessibility feature is particularly valuable in scenarios where hands are occupied, like when carrying heavy items, groceries, or when in inclement weather conditions.

The technology behind the Power Liftgate involves a combination of electrical components, motors, and sensors. Upon activation, the system prompts the motor to raise or lower the tailgate, ensuring smooth and controlled movement. Sensors play a crucial role in detecting obstacles or obstructions to prevent accidents or damage during operation.

However, like any mechanical feature, the Power Liftgate necessitates regular maintenance and care. This includes ensuring the system remains free of debris, periodic lubrication of moving parts, and conducting routine checks for smooth operation.

The integration of the Power Liftgate has significantly improved the overall convenience and user experience in modern vehicles. As automotive technology continues to evolve, we can expect further advancements and refinements in this area, potentially offering additional features and improved reliability in the future.

In the realm of vehicular mechanics, when foreign objects impede the lock and latch systems, the tailgate’s functionality is hindered, leading to difficulties in both opening and securely closing it. To remedy this issue, employing a socket set in conjunction with a spray of lithium grease is an effective approach.

The integration of power liftgates has notably simplified our daily routines, particularly when hands are occupied with groceries or during inclement weather. Nevertheless, similar to other components of a vehicle, the liftgate mechanism demands routine maintenance to ensure its prolonged operation and efficiency. The accumulation of debris poses a significant threat, resulting in a malfunctioning tailgate that may fail to open or latch securely. Consequently, a fundamental query arises: how can the power liftgate be adequately lubricated, and what steps should be taken when the tailgate fails to latch securely? These matters will be addressed below.

Procedure for Lubricating the Tailgate Mechanism Necessary Materials:

  • Socket set
  • Spray lithium grease
  • Compressed air (optional)

Accessing the Mechanism: Initiate the process by removing the access panel situated on the tailgate. In the case of a vehicle equipped with a bed liner, the tailgate section of the liner must first be removed to access this panel effectively.

Cleaning the Lock Mechanism: Once entry to the mechanism is achieved, it is crucial to ensure its cleanliness before applying any lubrication. Utilize compressed air to dislodge any debris present in the lock mechanism. This preliminary step guarantees an even application of grease, effectively lubricating the movable components.

Application of Lithium Grease: Subsequently, using the spray lithium grease, generously coat the cam/lever area. Ensure thorough coverage of all pivot points where movement transpires. This type of grease not only facilitates the lubrication of mobile parts but also furnishes a protective barrier against potential debris accumulation in the future.

Working the Grease: Post-application of the grease, actuate the tailgate handle multiple times. This maneuver aids in the uniform distribution of grease across the mechanism. Upon achieving smoother tailgate movement, apply an additional coat of grease for comprehensive coverage.

Reassembling the Tailgate: Reattach the access panel and, if detached, the bed liner’s tailgate section. Confirm the appropriate tightening of all screws and fixtures.

Rectifying a Non-Latching Tailgate:

If, post-lubrication, the tailgate still fails to latch, the issue might persist due to remaining debris. Follow the outlined lubrication steps meticulously, ensuring thorough elimination of any debris within the lock and latch mechanisms. If the issue persists despite cleaning and lubrication, seeking professional assistance might be advisable, as a more severe problem with the tailgate mechanism could be at play.

Tailgates, despite their robust build, necessitate consistent maintenance to uphold their functionality. Through periodic inspection, thorough cleaning, and systematic lubrication of the mechanism, the continuity of reliable service from your tailgate is assured. In cases where issues persist post-maintenance, seeking guidance from a qualified mechanic is strongly recommended to safeguard the safety and longevity of your vehicle.

November 3, 2023 0 comment
0 FacebookTwitterPinterestEmail
Detailing

Refining Your Deck Construction: 6 Tips for Mastering the Details

by auto_motivex November 2, 2023
written by auto_motivex

In the realm of DIY projects, constructing a deck ranks as one of the most favored undertakings, appealing to a wide spectrum of enthusiasts ranging from seasoned experts to weekend hobbyists. Who wouldn’t desire an ideal space to unwind outdoors, particularly when the weather is inviting?

However, the construction of a deck involves a substantial amount of effort, commencing from the meticulous planning phase to the final embellishments. As the old adage goes, when it comes to decks, the devil resides in the details. Achieving precision is imperative to ensure accurate positioning of joists, uniform spacing of railings, and other crucial aspects.

Depending on the type of deck being built, the inclusion of deck stairs might or might not be necessary. Although the discussion of stairs is beyond the scope of this context, should the need arise, the same meticulous attention to detail is essential.

The subsequent six recommendations for deck construction aim to facilitate the precise execution of every aspect when embarking on the construction of a deck.

1.Simplify Deck Joist Installation

offers a practical approach for installing deck joists, particularly when working solo. The suggested method involves affixing joist hangers to the ledger board before the joists’ installation. The crucial aspect lies in correctly positioning these hangers. Crafting a jig, as illustrated, utilizing a 5 x 12-in.

plywood piece and a 2×4 piece, tailored to the joist’s width, aids in ensuring accuracy. The jig aligns with the layout line, securely attached to the ledger board. By fastening the joist hanger around the 2×4 and using 16d galvanized nails through the holes into the ledger board, the hanger is firmly secured. Adjusting the 2×4 to the average joist width is crucial, considering potential variations in joist widths (sometimes deviating by as much as 1/4 in.).

Attaching the hanger flanges to the ledger board on both sides while allowing a minute gap on one side enables easy accommodation of a wet joist during installation. Should the joist sit too high, a notch at the bottom can be chiseled out, or shimming can rectify the situation if it sits too low.

2.Trimming Precise Notches

For accurately cutting a board around a deck post, a secure technique involves tightly positioning the deck board against the post. Employing a combination square, transfer the post’s location onto the board, ensuring a precise transfer of measurements for the notch depth.

When determining the depth of the notch, it’s essential to check both sides of the post. Posts may sometimes exhibit twists, leading to unequal measurements. Subsequently, using a jigsaw, proceed to cut out the notch with care and precision.

3.Straightening Warped Deck Boards

Despite the quality of the lumber provided by suppliers, a notable portion of decking boards often arrive warped. Rectifying bowed deck boards is an integral and customary procedure within deck construction. Initiating the process involves positioning the board with the bow facing inwards, securing one end with a nail. Subsequently, using a chisel, drive it into the joist and leverage the board towards you. Upon ensuring the board is tightly aligned with your spacer, proceed to affix it firmly to the joist.

4.Achieving Precision in Deck Board Trimming

The allure of a well-crafted deck lies within the minutiae. Employing a guiding board to direct the saw while trimming the decking ensures a sharper and more refined edge than what even the steadiest hand can produce.

To facilitate accurate trimming, affix a straight board as a guide for your circular saw onto the decking surface. Calculating the distance from the saw blade’s edge to the base plate, position the board to allow approximately a 1-inch overhang for the decking. While running the saw along the edge, ensure the saw plate remains parallel to the decking and snug against the guide.

Using a 2×2, similar to our approach, sight along its length from one end to confirm its alignment is perfectly straight. For the last two boards, a freehand cut is necessary. Mark the entire cutting line with a chalk line and maintain a steady, straight motion with your saw to achieve a precise cut.

5.Create a Tapered Post Cap

Introducing a cap atop your rail posts not only enhances the visual appeal of your deck but also serves to safeguard the exposed end grain of the post from the elements. While caps for 6×6 posts are typically obtained through special orders, an alternative method involves crafting your own using 2×10 materials, thereby saving both time and cost.

This specialized jig is constructed using 16-inch segments of 2×8 framing and 1/2-inch plywood, as depicted in the illustration. Precision in setting the plywood guide for the circular saw within the jig demands some experimentation. Fine-tune its positioning so that the blade creates a subtle reveal on the top surface of the cap. Subsequently, affix the cap to the posts using construction adhesive along with 3-inch galvanized finish nails.

6.Creating Uniform Spacing for Deck Balusters using a Jig

Crafting sections of deck railing becomes more efficient with the use of jigs, greatly favored by carpenters for their ability to streamline work processes. A practical jig comes in handy for aligning balusters on 3-1/2 in. wide rails while maintaining a consistent space between them, typically 4 inches or less.

During baluster attachment, initiating the process from the center ensures an equal residual space on each end. By measuring the overall length in advance, one can strategically commence with a baluster at the exact midpoint or begin with an opening centered — whichever approach brings the spacing between the final baluster and the post closest to the desired 4-inch maximum baluster opening.

November 2, 2023 0 comment
0 FacebookTwitterPinterestEmail
Blog

DOGTV: An Exceptional Solution for Dogs Left Alone at Home Throughout the Day

by alvarado, brandie November 1, 2023
written by alvarado, brandie

Many dogs often endure extended periods alone as their owners attend work or school, potentially leading to various issues stemming from extended isolation.

Let your dog enjoy all the benefits of DOGTV today!

Adverse Impact of Excessive Alone Time on Dogs Extended periods of inactivity can result in dogs becoming overweight, leading to various health issues such as:

Dogs spending extended periods alone might exhibit behaviors due to boredom or stress, including:

DOGTV: A Beneficial Tool for Dogs

DOGTV is an exclusive television channel created explicitly for dogs. Its development involved collaboration with leading dog behaviorists and experts in the field. Extensive research on canine behavior was leveraged to craft DOGTV’s programming. The channel features shows categorized into three types:

How is DOGTV Distinct from Regular TV?

All three types of programming on DOGTV are crafted based on contemporary research concerning canine vision, hearing, and behavior. This ensures that the television shows are tailored for maximum enjoyment by dogs. The arrangement and presentation of the three programming types aim to offer your dog the best daily rhythm, inducing periods of calmness and rest as well as playful and stimulating sessions.

“Pretty In Pink” – A Fantastic Way to Provide Companionship for Your Dog When You’re Absent

DOGTV serves as an excellent means to offer your dog many of the comforts and company you would provide if you were home all the time. In doing so, it helps prevent and potentially address some of the adverse effects of prolonged periods of solitude experienced by your dog. Separation anxiety ranks among the primary causes of euthanasia in dogs, as coming home to a destroyed house can be distressing.

While some dogs might require additional treatment for separation anxiety, and it’s important not to discontinue any medication previously prescribed by your veterinarian, DOGTV plays a significant role in mitigating the distress caused by separation anxiety and alleviating the other negative consequences of extended periods spent alone.

November 1, 2023 0 comment
0 FacebookTwitterPinterestEmail
Utility Trailers

Expanding 3X in Under a Minute: The Innovative New Camper

by auto_motivex November 1, 2023
written by auto_motivex

Exploring the Integration of Innovation in Camper Design

For years, the motor vehicle industry has witnessed substantial technological advancements; however, the core design and functionalities of pull-behind campers have seen limited evolution. Notably, two types prevailed: compact popup campers, easily portable but lacking in household amenities and weather protection, and slide-out campers, offering a mere extension of living space.

Enter BeauEr, a French company introducing an innovative line of expandable campers. These uniquely merge the portability of popup campers with the comforting amenities, weather resistance, and spaciousness of conventional models.

What sets the BeauEr camper apart?

At first glance, it resembles a typical pull-behind camper, yet its seemingly compact structure conceals two identically sized modules nested around a central space. These modules expand in opposite directions, effectively tripling the camper’s size. Impressively, this expansion is achieved by simply turning a key, taking just about 20 seconds to reach its full size.

Measuring a mere six feet in width when fully collapsed, the camper can be effortlessly towed by a wide array of vehicles, granting access to locations typically inaccessible to larger trailers. Featuring a kitchen, bathroom, bedroom, and dining area, these components seamlessly fit together when the camper is in its collapsed configuration. The retro design elements, reminiscent of 1960s campers, add to its overall allure.

Dimensions of the Camper

The BeauEr camper line was inaugurated with the 3x model in 2015 within European markets, expanding later to incorporate the smaller 2X and larger 3X+ models.

The 3X, when in its collapsed state, boasts approximate dimensions of six feet in width by nine feet in length. Upon expansion, it broadens to a 15-foot width, presenting nearly 130 square feet of living space suitable for a four-member family.

Conversely, the 3X+ commences at six feet in width and 20 feet in length, expanding to a 15-foot width and offering an expansive 300 square feet of living area, tailored for a six-member family.

Likewise, the 2X shares almost identical dimensions with the 3X in its closed state but employs a single telescoping unit expanding to a width of 10-1/2 feet, delivering roughly 90 square feet of living space designed for two occupants.

Pricing of Campers The cost distribution for the distinct models is outlined as follows:

  • 3X: Initiated at roughly $30,000, with potential costs soaring up to $50,000 inclusive of supplemental features.
  • 3X+: Commencing at approximately $60,000, with potential expenses extending to $80,000 with added features.
  • 2X: Commencing around $23,000 and escalating to $40,000 with additional features.

All models encompass standard features comprising a kitchen equipped with a refrigerator and gas burners, sleeping accommodations, a designated dining space, a compact bathroom furnished with a detachable toilet cassette, and diverse storage compartments. The 3X+ model integrates supplementary features such as an additional shower and a second bedroom, while upgraded amenities encompass a heater, air conditioner, water heater, solar panels, awnings, and more.

Acquisition Details

The BeauEr camper series is presently accessible for acquisition in Canada, Europe, China, and Korea; however, availability excludes the United States. Eric Beau, the founder, articulates, “I am presently in search of a business partner in America to oversee the importation of BeauEr caravans. Our company has received a substantial volume of inquiries from American consumers expressing interest in procuring our products, and we eagerly anticipate extending our market presence to your country.”

November 1, 2023 0 comment
0 FacebookTwitterPinterestEmail
Parts

Understanding Plug-In Hybrids: Unveiling Their Mechanism and Operations

by auto_motivex October 31, 2023
written by auto_motivex

Compared to gasoline cars, conventional hybrids, or battery-electric vehicles, understanding a plug-in hybrid can be particularly challenging. It operates akin to a regular hybrid, such as a Toyota Prius, yet presents an additional facet: functioning as an electric vehicle that recharges by plugging into a power source to energize a battery pack, enabling it to operate on electric power intermittently—but typically within a range of 20 to 60 miles.

This complexity often bewilders prospective car buyers. One commentator humorously suggested that plug-in hybrids are a solution devised by engineers to answer a question posed by bureaucrats, a question that no actual car buyer has ever raised: “How can I predominantly cover my anticipated daily mileage using electricity, while averting the range anxiety associated with a purely electric vehicle?”

The concept revolves around providing drivers who can charge their vehicles at home overnight with an electric range of 20 to 50 miles, adequate for their daily commuting and errands. According to data from the U.S. Department of Transportation, the average driver covers approximately 37 miles per day. However, for unforeseen longer trips or situations where charging isn’t feasible, these vehicles still function as fuel-efficient hybrids. For owners who primarily undertake short trips, the combustion engine might remain dormant for weeks, necessitating gasoline refills only every few months, provided they regularly recharge the vehicle.

Power-Split vs. Series Hybrids

There exist primarily two categories of plug-in hybrids: those that harmonize power derived from both the battery pack and the gasoline engine (referred to as “power-split hybrids”) and the far less common type where the gasoline engine functions solely as a generator to recharge the battery but lacks the ability to mechanically propel the wheels (known as “series hybrids”). The BMW i3 stands as a notable example of the latter.

The majority of power-split hybrids integrate torque from both the engine and the motor to propel the same axle. This configuration is employed by manufacturers like Toyota, Ford, and others. While many of these hybrids are front-wheel-drive vehicles, such as the Toyota Prius, some also offer all-wheel drive. All-wheel drive can be achieved through driveshafts that mechanically power the rear wheels (as seen in the 2005–2012 Ford Escape Hybrid) or via an electric motor that propels the rear wheels (as evident in the current Toyota Prius or RAV4 Hybrid).

Alternatively, a select few hybrids utilize the gasoline engine primarily to power one axle but incorporate an electric motor to drive the other end of the vehicle. The hybrid function occurs when the powertrain control system determines whether gasoline or electric power needs to supplement the mode already propelling the vehicle. This variant is known as a “through-the-road hybrid” because the engine and motor power combine exclusively through the four wheels, without interaction within the powertrain itself. While there are no vehicles solely powered by a gasoline engine for one axle and exclusively electric power for the other, a closely related example is the new Dodge Hornet R/T (and its similar counterpart, the Alfa Romeo Tonale). These models feature a robust electric motor propelling the rear wheels (thus functioning as rear-wheel drive in electric mode) while also integrating a small electric motor that assists the gas engine upfront.

Single Motor vs. Dual Motor Configurations in Plug-In Hybrids

However, drivers will discern a distinct variance in driving experience between plug-in hybrids equipped with a two-motor system, which collaborates through a planetary gearset to serve as a transmission (as seen in the Toyota and Ford models), and those employing a single electric motor positioned between the engine and a traditional automatic transmission (adopted in some newer Fords, all Hyundai and Kia models, Mazda, etc.).

The utilization of two motors and a planetary gearset allows for continuous adjustment of ratios. In contrast, an electric motor situated between an engine and gearbox propels the vehicle through that gearbox, resulting in the retention of standard shifting patterns even when operating in the electric mode. However, these shifts often tend to be less seamless compared to those from a conventional internal combustion engine powertrain.

Electric Power versus Total Power

Drivers will also observe a significant difference in the power output of Plug-in Hybrid Electric Vehicles (PHEVs) when operating solely on electricity in comparison to when they utilize gasoline alone or a combination of gasoline and electric power. For instance, consider the 2024 Mazda CX-90 PHEV: its electric motor is rated at 173 horsepower, yet the combined gasoline-electric hybrid system generates an overall output of 323 horsepower. Consequently, acceleration from 0 to 60 mph significantly decreases from a rapid 5.9 seconds when functioning as a hybrid to over 11 seconds in EV mode. This disparity in acceleration makes it challenging to keep pace with traffic or swiftly merge onto an interstate without engaging the gas engine.

The two iterations of the Chevrolet Volt (2011–2015 and 2016–2018) were distinctive among plug-in hybrids for delivering nearly identical performance, whether the car operated solely on battery power or in gasoline hybrid mode.

Plug-In Behavior: A Regulatory Challenge

The ultimate quandary concerning plug-in hybrids—pertaining not to the owners but to regulatory bodies—is whether these vehicles are actually connected to a power source. If they remain unconnected, they essentially function as marginally improved hybrids, adding weight, inflating costs, and frequently benefiting from substantial purchase incentives, even if they never utilize the electric grid.

Throughout the 2010s, the two leading plug-in hybrid manufacturers (GM and Ford) disclosed compiled data on owners’ practices of plugging in their vehicles to both the media and regulatory authorities. For instance, a 2013 report by the U.S. Department of Energy indicated that 75 percent of the miles covered by the Chevy Volt were powered by grid electricity.

Unfortunately, in the early 2020s, neither of the two primary plug-in hybrid manufacturers (Toyota and Jeep) were inclined to share data concerning the frequency or occurrence of their vehicles being connected to a power source. To them, it appears inconsequential. They receive regulatory acknowledgment for selling the vehicles, regardless of the owners’ usage patterns. Moreover, plug-in hybrids often come with incentives that salespeople can employ to lower the purchase price, making it comparable to that of a standard hybrid, even though the plug-in hybrid frequently boasts superior trim specifications, justifying its higher retail price.

October 31, 2023 0 comment
0 FacebookTwitterPinterestEmail
Newer Posts
Older Posts

Recent Posts

  • Effective Cleaning Methods for Tonneau Covers
  • Approaches to Retain the Enchanting New – Car Fragrance
  • Optimal Car Trash Can Choices
  • Optimal Strategies for Cleaning and Maintaining Truck Running Boards
  • 环保型机油处理与回收

Recent Comments

  • Korey on What is the Recommended Frequency for Motorcycle Oil Changes?
  • Greg on What is the Recommended Frequency for Motorcycle Oil Changes?
  • Reye on Transporting Cargo with Pickup Trucks
  • mark on How to Properly Hook Up a Trailer?
  • marcus on What is the Recommended Frequency for Motorcycle Oil Changes?
  • Facebook
  • Twitter

@2020 - All Right Reserved. Designed and Developed by Auto-Motivex


Back To Top
Auto Motivex
  • Detailing
  • Motorcycle
  • Parts
  • Truck
  • Utility Trailers
  • Blog