• Detailing
  • Motorcycle
  • Parts
  • Truck
  • Utility Trailers
  • Blog
Auto Motivex
keep your memories alive
Motorcycle

Motorcycle Safety: Ensuring a Safe Ride

by auto_motivex October 8, 2023
written by auto_motivex

Motorcycle safety is a paramount concern encompassing various practices, regulations, and equipment aimed at minimizing risks and ensuring the well-being of motorcycle riders and other road users. It involves a combination of rider education, responsible riding habits, proper gear usage, and adherence to traffic laws to create a safer environment for everyone on the road.

1、Protective Gear:

Wearing appropriate protective gear is fundamental. This includes a DOT-approved helmet, eye protection, durable jackets, gloves, full pants, and sturdy boots. These items significantly reduce the severity of injuries in case of an accident.

2、Skill and Training:

Riders should undergo comprehensive motorcycle training courses to acquire essential riding skills. These courses cover topics like proper braking, cornering techniques, emergency maneuvers, and hazard awareness. Continuous education and practice are crucial to improving riding skills and safety.

3、Defensive Riding:

Motorcyclists need to adopt a defensive riding approach, anticipating potential hazards and being prepared to react to unexpected situations. Defensive riding includes maintaining safe distances, staying visible to other drivers, and being mindful of blind spots.

4、Adherence to Traffic Laws:

Following traffic laws and regulations is imperative for motorcycle safety. This includes obeying speed limits, yielding right of way, using turn signals, and not driving under the influence of alcohol or drugs.

5、Regular Maintenance:

Proper maintenance of the motorcycle is essential for safety. Regular checks of brakes, tires, lights, and other vital components ensure that the motorcycle is in optimal working condition.

6、Avoiding Distractions:

Staying focused and minimizing distractions while riding is crucial. Avoid using phones, adjusting radios, or engaging in activities that divert attention from the road.

7、Weather Awareness:

Being mindful of weather conditions is vital for motorcycle safety. Adverse weather like rain, snow, or strong winds can significantly affect visibility and traction, requiring riders to adjust their speed and driving techniques accordingly.

8、Group Riding Etiquette:

When riding in a group, proper communication and spacing are essential. Riders should maintain a staggered formation, use hand signals, and adhere to a designated leader for a more organized and safer ride.

9、Sharing the Road:

Motorcyclists must be aware of other vehicles and their blind spots, particularly in larger traffic. Avoiding riding in a vehicle’s blind spot and assuming that other drivers may not always see you can prevent accidents.

10、Lifelong Learning and Improvement:

Experienced riders should continue educating themselves on advanced riding techniques and safety measures. Participating in advanced training courses or joining rider groups can enhance skills and knowledge, contributing to safer riding habits.

In conclusion, motorcycle safety involves a combination of proper gear usage, continuous training, defensive riding practices, adherence to traffic laws, regular maintenance, and being aware of one’s surroundings. By prioritizing safety and responsible riding, motorcycle enthusiasts can significantly reduce the risks associated with this mode of transportation.


October 8, 2023 0 comment
0 FacebookTwitterPinterestEmail
Utility Trailers

Enhancing Trailers – Our Favorites

by auto_motivex October 7, 2023
written by auto_motivex

Our associates at Family Handyman embarked on the Ultimate Camper project and discovered some remarkable products for enhancing trailers. Presented below are three options you can consider to upgrade your own trailer. Our associates at Family Handyman have been actively engaged in the restoration of a vintage 1972 Avion Trailer. Considering that many of you likely transport trailers between various job sites, today, I’m eager to introduce several products that the Family Handyman team utilized in their project. This way, you too can elevate your trailer experience to an optimal level. Watch Marty Dyck’s insights on these trailer products in the video below, and continue reading for more details, including where to purchase them.

Weather Guard Storage Chest:

If you’re in need of a secure storage solution for your frequently used tools or materials, this versatile chest is the perfect fit. Designed to rest below a truck bed rail, it can also be securely bolted to the tongue of your trailer, offering additional storage capacity. Its design allows for zero clearance when opening the cover, allowing a snug fit against your trailer. The lid opens to a 90-degree angle and is equipped with hydraulic stays for easy access. Additionally, the cover features a full weather seal and an automotive-style rotary latch mechanism, effectively keeping out the elements. The tamper-resistant lock ensures secure storage, embodying the Weather Guard reputation for providing a robust and nearly impenetrable storage solution.

Master Lock Trailer Lock:

When you leave your trailer at a job site, ensuring its safety is paramount. The Master Lock hitch lock in a distinctive red color is a highly effective theft deterrent for trailers. Its universal size fits all ball hitch couplers, making it a versatile choice. Installation and removal are straightforward, and the locking mechanism is robust, resisting picking and prying attempts. The durable finish provides resistance against rust and corrosion. Despite its affordable cost, this lock offers immense peace of mind, safeguarding your valuable trailer.

DoHonest Wireless Backup Camera:

When maneuvering your trailer into a tight space, having a clear view of your path is essential. The DoHonest Wireless Backup Camera system excels in providing just that. Moreover, it’s highly effective on the highway for monitoring the rear view. The seven-inch HD vehicle monitor screen offers the flexibility to flip the image to a normal facing or rear mirror orientation. It also supports a split-screen feature, allowing you to connect and view up to four cameras simultaneously. The waterproof camera is equipped with night vision technology, ensuring clarity even in dark conditions.

Installation is a breeze due to its wireless functionality, eliminating the need to run cables from the camera to the monitor. The wireless range is notably impressive, exceeding the manufacturer’s specified range of 65 feet. The convenience of this system becomes evident when avoiding unexpected obstacles, such as nails embedded in 2x4s, while backing your trailer.

About Marty Dyck:

Marty Dyck is a seasoned woodworker and the proud owner of “Good From Wood,” a bespoke woodworking shop situated in Stillwater, Minnesota. Specializing in crafting distinctive vintage barn doors, custom skateboards, and various innovative wood products, Marty aspires to create pieces that leave a lasting impression and spark conversations.

October 7, 2023 0 comment
0 FacebookTwitterPinterestEmail
Truck

Truck Bed Reach Tool

by auto_motivex October 7, 2023
written by auto_motivex

The “Truck Bed Reach Stick” refers to a specialized tool designed to aid in reaching and accessing the contents of a truck bed. It’s particularly useful for pickup trucks, which often have deep and sometimes hard-to-reach truck beds. The reach stick typically features a long handle, sometimes extendable, allowing the user to access items at the far end of the truck bed without the need to climb into the bed itself. This tool enhances convenience, safety, and efficiency when loading, unloading, or organizing items in the truck bed.

A truck chassis reach bar is typically a long, slender tool made of durable materials such as metal or composite materials. It resembles a rod or pole, often extendable, allowing for versatility in reaching various components within the truck chassis. One end of the reach bar is usually designed with a grip or handle for comfortable and secure holding, while the other end is fashioned to engage with specific controls or mechanisms.

The engaging end can vary in design, featuring hooks, forks, or other specialized fittings that enable a secure connection to the intended components. The design ensures stability and control when manipulating levers, switches, or valves that may be located in confined or challenging-to-reach areas within the truck chassis.

Overall, a truck chassis reach bar is a functional tool, engineered for ease of use, durability, and efficient operation when accessing and operating components within the truck chassis.

The truck chassis reach rod serves a crucial function in enhancing the accessibility and ease of operating various components of a truck chassis. Primarily, it’s designed to assist in reaching and manipulating specific mechanisms or controls that are located in areas that might be challenging to access directly. This includes parts such as brake release valves, air suspension controls, or other essential features situated in confined or hard-to-reach spaces within the chassis.

The reach rod typically consists of a long, slender, and extendable metal or composite rod. One end of the rod is usually fitted with a grip or handle, while the other end is structured to securely engage with the targeted control or mechanism. By employing the reach rod, operators can effectively actuate or adjust these components without requiring direct physical access, thus enhancing safety and efficiency during maintenance, repairs, or adjustments to the truck chassis.

The truck chassis reach bar is typically stored within the truck cabin or readily accessible in the truck’s storage compartments. Its placement aims for convenience and quick access for the driver or maintenance personnel. Common locations for storing the reach bar include:

  1. Behind the Driver’s Seat: Many trucks have a designated slot or holder behind the driver’s seat where the reach bar can be secured. This allows for easy access without exiting the cabin.
  2. In the Cab’s Storage Compartment: Some trucks have a storage compartment within the cabin, often above the windshield or within arm’s reach, where the reach bar can be stored.
  3. In the Truck Bed or Storage Boxes: For larger trucks or those with specialized storage compartments, the reach bar may be kept in the truck bed or storage boxes for accessibility while accessing the chassis from outside.
  4. Mounted on the Chassis: In some cases, the reach bar may be mounted on the exterior of the truck, usually on the chassis frame, for easy access when working around the chassis.
  5. Near the Air Brake Controls: Given that the reach bar is frequently used for air brake release or adjustment, it may be placed near the air brake controls for quick and direct access.

The location ultimately depends on the truck’s design, the preference of the trucking company, and the convenience and safety considerations for the personnel using the reach bar.

October 7, 2023 0 comment
0 FacebookTwitterPinterestEmail
Detailing

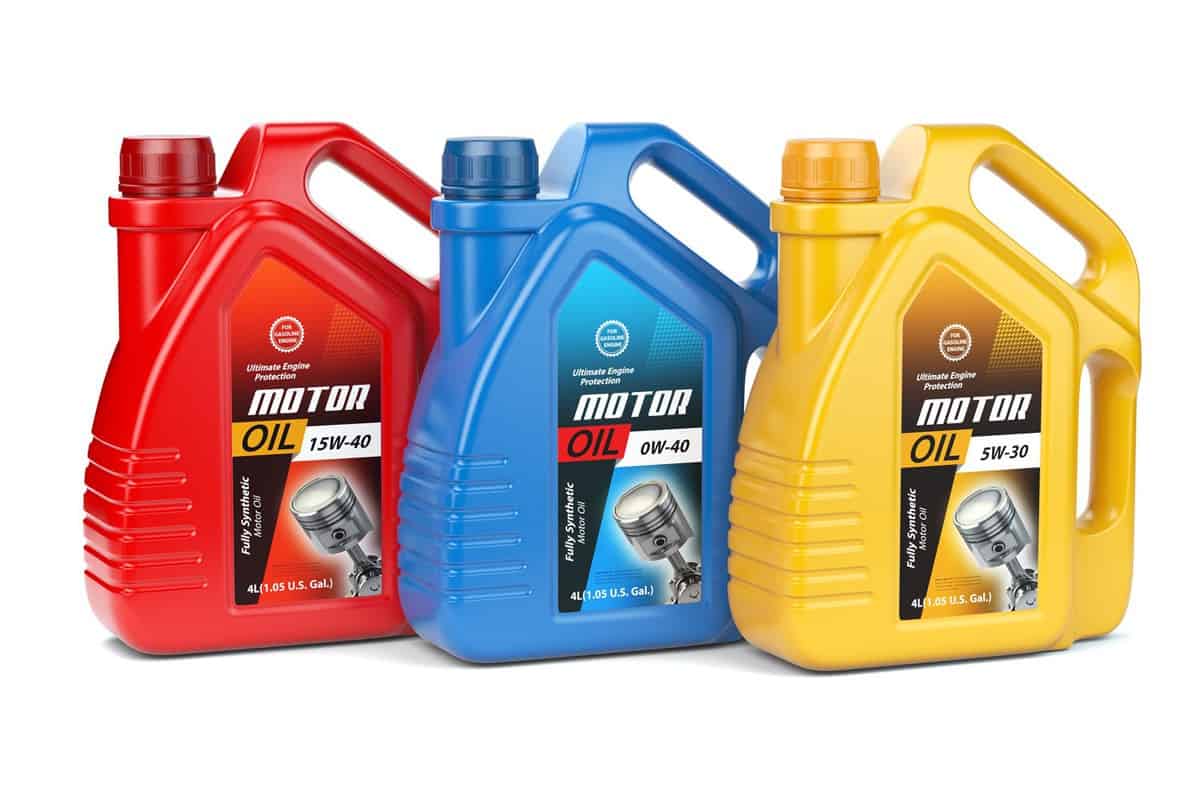
An Informative Guide to Varieties of Motor Oil

by auto_motivex October 6, 2023
written by auto_motivex

Motor oil selection can be perplexing, and opting for the wrong type may lead to significant engine damage, in turn incurring high costs. In this guide, we will elucidate the various types of motor oil to facilitate informed decision-making

All lubricating oils can appear and feel alike unless oil-soluble dyes are incorporated to modify their color for easier identification. This similarity poses a challenge.

During my early days at an automobile repair workshop, we stored motor oil in 55-gallon drums. We would manually pump it into oil dispensing funnels and then add it to engines during oil changes. This routine worked well until a drum containing hydraulic oil was mislabeled as 10W-30 motor oil. Fortunately, we detected the error promptly and replaced the oil and filter in all the affected vehicles, except for one.

We immediately contacted the vehicle owner and arranged for the car to be towed back the following day. Although the engine was already emitting a slight knock, a new oil pump and the correct oil resolved the issue. If the car had been driven any further, the engine would have inevitably suffered significant damage, incurring substantial expenses. Presently, the cost of a new six-cylinder engine is approximately $5,500, with an additional $2,000 for labor.

In summary, selecting the appropriate motor oil should no longer be a perplexing task. We are here to assist you in making the optimal choice for your vehicle or power equipment.

Motor oil is essentially the lifeblood of an engine, performing vital functions such as cleaning, lubricating, cooling, cushioning, and safeguarding engine components against wear. Additionally, it suspends sludge, harsh chemicals, contaminants, and abrasive particles that are known to induce engine wear.

Different Types of Motor Oil

Most modern motor oils share a common appearance—a transparent yellowish amber hue, reminiscent of olive oil in consistency. However, it’s crucial to understand that motor oils are not interchangeable, necessitating a thoughtful selection based on the type of vehicle or equipment you own—be it a car, truck, motorcycle, or power equipment.

Always adhere to the specific motor oil recommended by the vehicle manufacturer or outlined in the OEM specifications. These specifications are typically detailed in the owner’s or user’s manual. Additionally, consider the prevailing conditions, such as the type of driving (city vs. highway), off-roading, temperature, dust, and dirt. For power equipment, factor in the duration of tool usage.

Conventional Motor Oil

Originating as crude (base) oil from the ground, all motor oil undergoes a refining process to eliminate impurities. It is then blended with additives that counteract sludge formation and prevent corrosion. Conventional oils are ideal for:

  • Cars and light trucks that do not necessitate synthetic motor oils.
  • Four-stroke power equipment, encompassing both single and multiple-cylinder engines (e.g., older lawn mowers, power washers, generators, outboard motors, snow blowers) that do not require synthetic oil.
  • Two-stroke conventional motor oils are meticulously refined for small gasoline-powered engines in various equipment.

High-Mileage Motor Oil

Tailored for vehicles boasting 75,000 miles or more, high-mileage motor oil incorporates enriched additives that prompt the swelling of internal and external O-rings and gaskets. This swelling action potentially minimizes oil leaks and oil consumption in aging engines. Ideal for use in high-mileage cars and light trucks.

Full-Synthetic Motor Oil

Full-synthetic motor oil represents the epitome of engine protection. Rigorous distillation and refining procedures meticulously eliminate a greater proportion of impurities. Additionally, chemically enhanced friction modifiers are introduced, offering unparalleled engine safeguarding not present in conventional or synthetic-blend oils.

While synthetic oil offers superior performance, it’s not recommended for older model vehicles and equipment designed for conventional oil use. Utilize full-synthetic motor oil in:

  • Modern cars and light trucks featuring various engine configurations, encompassing turbocharged and diesel engines.
  • Contemporary motorcycles employing air- or water-cooling systems without a wet clutch.
  • Recent two- and four-cycle air-cooled power equipment such as portable concrete saws, snowmobiles, and jet skis, unless otherwise advised by the OEM.

Synthetic Blend Motor Oil

Synthetic blend motor oil is a fusion of conventional oils and synthetic compounds, offering a blend of benefits. It delivers remarkable engine protection at a more economical price point compared to full synthetics. Suitable for use in:

  • Automobiles and light trucks powered by non-turbocharged or non-diesel engines.
  • Motorcycles equipped with air- and water-cooled engines.
  • The majority of air- and water-cooled four-stroke power equipment engines with single or multiple cylinders (verify OEM recommendations beforehand).

Racing Motor Oil

Racing motor oils represent a category of full synthetics designed to endure the stresses of high-revving, full-throttle engine operations and heavy loads. These oils are compatible with both air- and water-cooled engines. They enhance wet-clutch performance in motorcycles by eliminating “friction modifiers” such as molybdenum, which could cause shifting difficulties. Recommended for use in:

  • Racing motorcycle engines and drivetrains (refer to OEM recommendations);
  • Four-cycle small engines like log splitters, pump motors, compressors, and go-carts;
  • Four-cycle air-cooled small engines and long-running backup generators.

Marine Motor Oil

Motor oil tailored for marine engines is available in both conventional and full synthetic formulations, specifically crafted for two- or four-stroke high-revving marine engines. Additives present in marine motor oils provide superior corrosion protection and resist thermal breakdown even under extreme summer temperatures and demanding engine loads. Choose a brand that is compatible with boat engines, whether equipped with or without catalytic converters. Ideal for stern-drive and outboard motors.

October 6, 2023 0 comment
0 FacebookTwitterPinterestEmail
Parts

8 Essential Ceiling Fan Parts and Accessories

by auto_motivex October 6, 2023
written by auto_motivex

Whether you’re installing a new ceiling fan or repairing an existing one, familiarize yourself with these essential components.

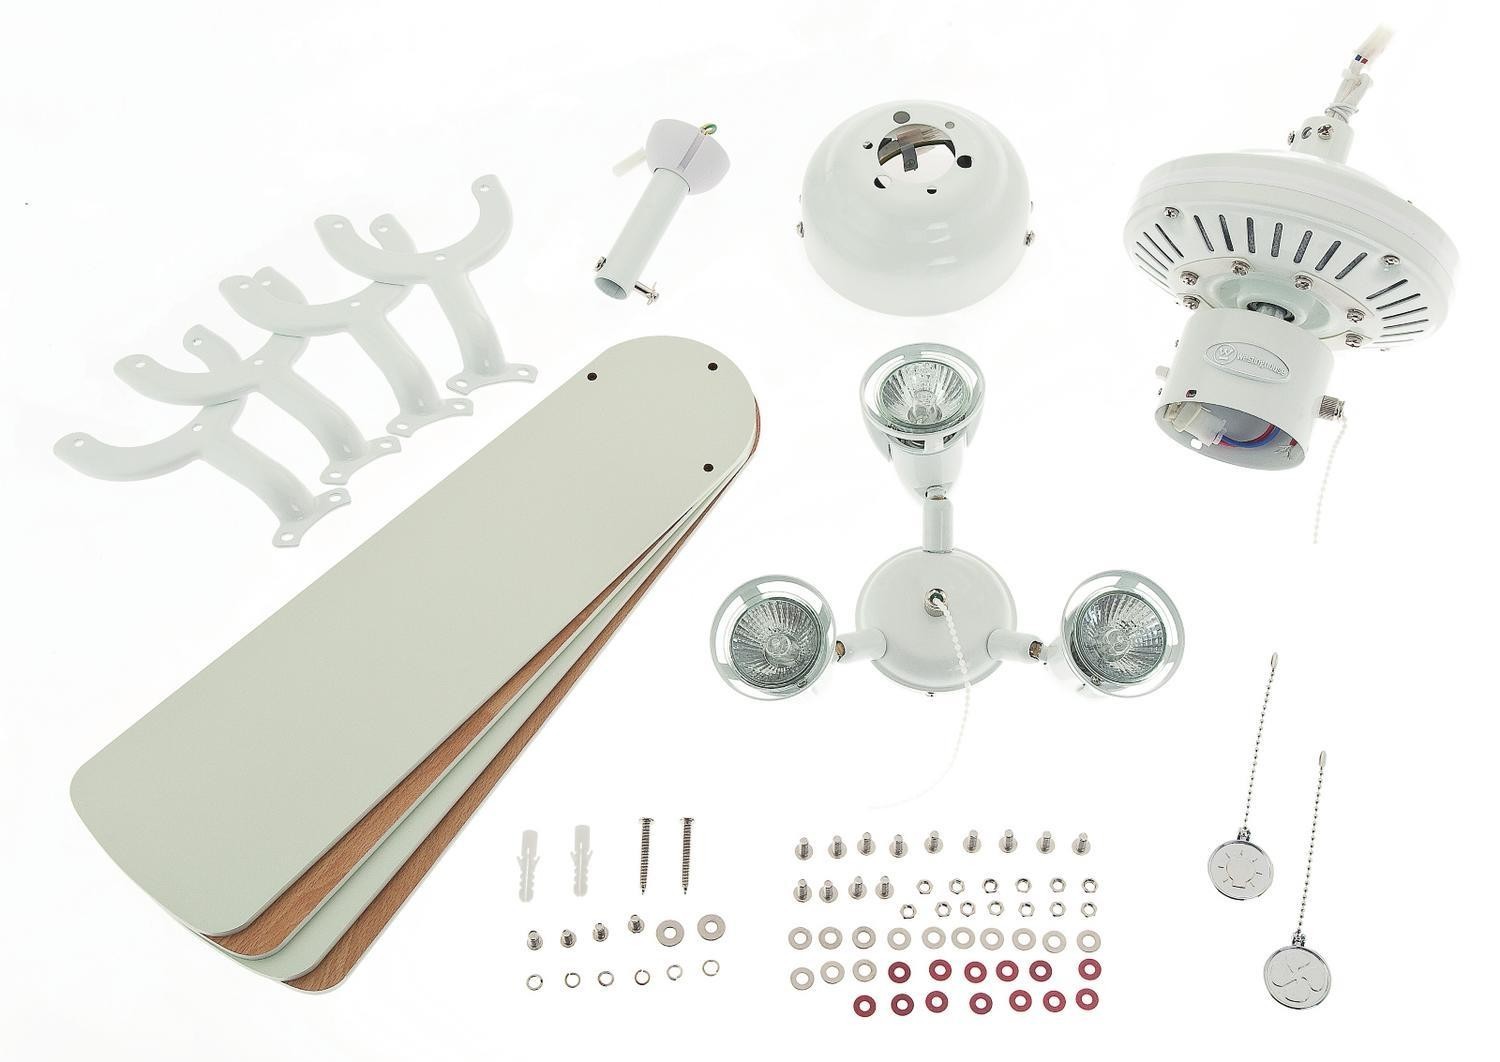
Common Ceiling Fan Components and Accessories For DIY enthusiasts, working on the installation or repair of a ceiling fan is a probable task. Having a good grasp of ceiling fan parts and accessories is essential as it enables you to maintain the fan effectively and potentially avoid future repair needs. Whether you’re a first-time installer, fixing an existing fan, or aiming to enhance its functionality, understanding these common components is fundamental.

Ceiling Fan Components:

Blades, Blade Arms, and Light Kits Ceiling fan blades, critical for air circulation, are notably larger than those of typical table or box fans. While the number of blades can vary, a typical ceiling fan would have four or five blades. Harbor Breeze offers a pack of five ceiling fan blades in diverse shapes and colors to match your décor.

Blade arms

serve as connectors between the blades and the motor.If these components become loose, they can disrupt the fan’s balance. The number of blade arms should correspond to the number of blades on your fan. For instance, a fan with five blades should use a pack of five blade arms to maintain balance. Various finishes and styles are available for these parts, such as the bronze-finished and scalloped-edge blade arms from Harbor Breeze.

Light kits

for ceiling fans enable a fusion of both overhead lighting and air movement. Options include a single light globe covering multiple bulbs or individual glass or plastic shades for each bulb, depending on your design preference. It’s important to note that light covers tend to accumulate dust and need occasional removal and washing.

Ceiling Fan Controls:

Pull Chains, Mounting Hardware, and Wall Switch Pull chains are among the most commonly replaced ceiling fan components due to their wear and tear over time. Luckily, they are also one of the simplest parts to replace. You can opt for an affordable and straightforward pull chain replacement or choose one with labeled features for convenience.

Mounting hardware

Mounting hardware is essential for installing new ceiling fans. While some ceiling fan kits include all necessary mounting hardware, others may require you to purchase these components separately. Major home improvement retailers like Lowe’s and The Home Depot offer ceiling fan mounting hardware kits both in-store and online.

notable

A notable inconvenience of ceiling fans is the pull chain mechanism, especially for shorter individuals and children, making it frustrating to reach and adjust the fan speed. Installing a wall switch with speed controls alleviates this issue and provides a more convenient way for everyone to manage the fan and light functions from a single location. This wall switch consolidates fan and light control, representing one of the most practical ceiling fan components and accessories.

Ceiling Fan Accessories:

Remote Controls and Extension Downrods For added convenience and functionality, consider incorporating a remote control into your ceiling fan setup. This handy accessory allows you to effortlessly turn the fan on and off without having to leave your seat, proving particularly beneficial for bedroom ceiling fans, especially during nighttime.

Various options are available, and this ceiling fan remote control, for example, offers both speed control and light dimming capabilities, enhancing your control over the fan’s operation.

Extension downrods

Extension downrods serve to adjust the ceiling fan’s height, a crucial aspect depending on your ceiling height. The appropriate length of the downrod is determined by the ceiling’s elevation. Taller ceilings necessitate a fan that hangs lower to ensure optimal air movement and effective cooling. An economical choice, like this 12-inch black downrod, is available, but you can explore a range of lengths, diameters, and colors to suit your preferences.

October 6, 2023 0 comment
0 FacebookTwitterPinterestEmail
Detailing

15 Insider Secrets for Professional Car Detailing

by auto_motivex October 5, 2023
written by auto_motivex

Clear Water Rinse Prior to Washing

Initiating the car detailing process by dousing the vehicle with clear water is a fundamental step. Washing a dry paint surface with soapy water will only grind the existing surface dust and road grit into the paint finish. Professional detailers prioritize commencing with a thorough clear water rinse to eliminate as much dust and dirt as possible.

Opt for the Appropriate Cleaning

Agent While dishwashing liquid is a popular choice among DIYers, it is not the ideal option. Dishwashing detergent is overly harsh, extracting essential oils from the car’s finish and potentially reducing the longevity of the paint. A proficient car detailer opts for specialized car wash soap, such as Meguiar’s Gold Class Car Wash, designed for professional car detailing.

Switch from Sponges to Microfiber Mitts

Conventional sponges tend to trap and retain dirt and grit within their substantial pores. Even when wrung out, the embedded grit persists. Once grit becomes embedded, washing the car is akin to using sandpaper. In contrast, a seasoned car detailer employs a microfiber car wash mitt, as the grit easily dislodges during rinsing.

Implement the Two-Bucket Method

Employ two separate buckets, one for clean soapy water and the other for rinse water. After each wipe, immerse the used wash mitt into the rinse water bucket, agitating it to dislodge dirt and grit. Subsequently, dip it into the soapy water to resume cleaning. Before moving to the other side of the car, empty the dirty rinse water, refill with fresh water to maintain the cleanliness of the soapy water.

Opt for Microfiber Towels Over Chamois for Drying

While chamois can effectively soak up water, they fall short in capturing residual grit post-rinsing. Instead, they tend to grind these particles into the paint, potentially causing damage. Conversely, a microfiber towel adeptly collects these particles. Utilize a microfiber towel in clean water to eliminate grit and moisture. Wring out the towel as needed to continue the drying process.

Address Minor Scratches Prior to Polishing

This critical step distinguishes between DIYers and seasoned professional car detailers. Polishing enhances the shine of the car’s surface but doesn’t eliminate scratches. However, by first addressing minor scratches using a scratch removal kit and then proceeding to polish, you can achieve an even more radiant shine. Scratch removal kits are readily available at any auto parts store.

Acquire a Dual-Action Polisher

A dual-action polisher is an indispensable tool for any car detailer. It’s important to differentiate this tool from a high-speed buffer, which operates at significantly higher speeds and can potentially damage the paint if not used correctly. On the other hand, polishers function at lower speeds and employ an oscillating motion as they rotate. Polishing with a dual-action polisher is easily grasped by DIYers within a few minutes. Incorporating polishing before applying wax yields significant benefits.

Opt for Synthetic Wax

While traditional paste waxes may enhance the appearance of antique cars, they lack the luster and durability characteristic of modern synthetic waxes, which impart a desirable “wet look.” Additionally, synthetic waxes last longer than their traditional counterparts. Many times, when car dealers promote paint sealants, they’re essentially applying a high-quality synthetic wax—something you can undertake yourself at a fraction of the cost. Apply synthetic wax in manageable sections using a wax applicator sponge.

Remove Wax Residue with a Microfiber

Towel Indeed, microfiber towels stand as essential tools for car detailers everywhere. Employ circular motions to wipe off any wax residue. As the towel accumulates wax, refold it to access a cleaner section. When the first towel reaches its capacity, switch to a second towel to continue the process.

Commence from the Top

In typical DIY approaches, the cleaning process usually initiates with the carpet, inadvertently leading to the redistribution of dirt from the dash, seats, and door panels back onto the freshly cleaned carpet. However, professional detailers adopt a top-down strategy, commencing from the highest points and gradually working their way down to the carpet.

Simultaneous Cleanup

Employ a small detailer’s brush in conjunction with a shop vacuum to effectively eliminate dust and dirt from all the intricate crevices present on your dash and console. This approach is a fundamental tool in the realm of professional car detailing. Position the shop vacuum wand in close proximity to your brush to instantly suction away all the debris while progressing towards the floor.

Thorough Carpet Brushing and Vacuuming

Automotive carpets tend to retain dirt tenaciously. Merely using a vacuum cleaner may leave a substantial amount of dirt behind. To achieve a more comprehensive dirt removal, detailers utilize a robust brush to vigorously scrub the carpet while simultaneously employing a vacuum. This process reveals dirt particles, allowing you to promptly suction them up using your shop vacuum.

Utilize a Silicone-Free Matte Finish Dash and Vinyl Protectant

Conventional silicone-based dashboard protectant sprays tend to leave a slippery film on your dash, attracting more dust and necessitating frequent cleaning. Moreover, a glossy dashboard can cause reflections on the windshield, potentially impeding your visibility, especially during nighttime. This is why professional detailers opt for silicone-free protectants with a matte finish. Not only do they maintain an appealing appearance, but they also minimize glare.

Lubricate Door Seals

It’s likely that you wiped away any lubricant from the door seals while cleaning the door. Detailers always ensure to reapply silicone spray to treat the seals. Simply spray some onto a rag and wipe it across the entire door seal. The silicone serves to prevent the seals from sticking, both in hot summers and cold winters.

Conclude with the Glass

If you cleaned the interior windows prior to the dashboard and vinyl protectant, you’ll find the need to clean them once more. Hence, detailers reserve glass cleaning for the final step. Cleaning the windows at this stage removes any overspray from previous cleaning and vinyl treatments, leaving you with impeccably clean windows.

October 5, 2023 0 comment
0 FacebookTwitterPinterestEmail
Motorcycle

Temporary Halt: BMW Pauses Sales of Gasoline Motorcycles

by auto_motivex October 5, 2023
written by auto_motivex

Last month, BMW made a notable announcement through a statement to Web Bike World. The announcement outlined details regarding their decision to temporarily halt the sale of specific motorcycle models. In this context, we will delve into what is presently known about this “stop sale” determination, encompassing the impacted models, the rationale behind the halt in sales, whether the motorcycles remain safe for riding, and the anticipated timeline for their reintroduction into the market.

Which BMW Motorcycles Are Temporarily Unavailable for Purchase?

In their comprehensive official statement (provided in its entirety below), BMW clarifies that the “stop sale” directive pertains to “all new and pre-owned BMW motorcycle models in dealer inventory, except for the CE 04.” It’s noteworthy that the CE 04 represents BMW’s sole electric motorcycle model, meaning this suspension of sales encompasses the entirety of BMW’s gasoline-powered motorcycles.

Why Has BMW Suspended the Sale of Gasoline Motorcycles?

The primary impetus behind this decision, as outlined by the company, centers on the evaporative systems integrated into the motorcycles. BMW states that these systems “may not have been produced to material specifications.” While the exact nature of the issue remains unspecified by BMW, industry experts from Web Bike World, Electrek, and BMW Owners News have construed this as indicating that numerous generations of BMW gasoline motorcycles fail to meet the emissions standards set by both Canada and the United States.

Can I Still Operate My BMW Gasoline Motorcycle?

According to the official statement released by the company, “[t]his temporary stop sale is not safety related, and BMW owners may continue to ride their motorcycles as usual.” The company’s explicit emphasis on safety has heightened suspicions that the issue is related to environmental impact.

Will BMW Resume the Sale of Gasoline Motorcycles?

Most likely. BMW has characterized the stoppage in sales as “temporary” and “voluntary.” This implies that BMW intends to resume the sale of gasoline motorcycles once it addresses the undisclosed problem related to the evaporative systems. However, the company has not provided a timeline for when this resolution might be achieved.

What Is the BMW CE 04?

The BMW CE 04 is currently the sole electric motorcycle offered by BMW in North America, although it will soon be accompanied by the CE 02. Described as a “maxi-scooter” by Electrek, this 31 kW (42 hp) bike boasts a futuristic design, notably departing from the conventional deep step-through frame typical of most scooters. It can achieve speeds of up to 75 mph and has been available in North America for approximately two years now.

Should I Consider Switching to an Electric Motorcycle?

It’s a possibility worth considering. While electric motorcycles may not be suitable for every rider, they do present a safer and cleaner fuel alternative for casual motorcyclists. Electrek highlights that although electric bikes may encounter “a battery fire here or there,” gasoline-powered cars and motorcycles contribute to significantly higher vehicle fire incidents. Additionally, electric motorcycles do not emit harmful particulates or carcinogens into the air. If you’re contemplating a BMW motorcycle purchase, now might be an opportune time to transition to electric.

The specific reason behind this temporary stoppage revolves around the motorcycles’ evaporative systems. According to BMW, these systems might not have been manufactured to the required material specifications. While the exact issue was not delineated by the company, experts from various quarters have interpreted it as a potential non-compliance with Canadian and American emissions standards across multiple generations of BMW gasoline motorcycles.

Despite the stoppage, BMW has clarified that this is not a safety-related concern. Owners of BMW gasoline motorcycles are permitted to continue using their bikes as they normally would. However, the explicit mention of safety has led to speculation that the problem may be associated with environmental impacts.

Looking ahead, BMW has characterized this halt in sales as temporary and voluntary. This suggests that the company plans to resume the sale of gasoline motorcycles once the undisclosed issue related to the evaporative systems is rectified. However, BMW has not provided a timeline for when this might occur, leaving enthusiasts and industry observers awaiting further updates on this intriguing development.

October 5, 2023 0 comment
0 FacebookTwitterPinterestEmail
Truck

11 Clever Pickup Truck Bed Hacks

by auto_motivex October 4, 2023
written by auto_motivex

Enhance the functionality and aesthetics of your pickup truck bed with these practical tips, streamlining storage, loading, unloading, and improving overall utility.

  1. Truck Bed Drawers Achieve a sleek appearance while optimizing organization by constructing custom drawer slides for your pickup truck bed. This DIY project involves creating spacious drawers and incorporating compartments for efficient and concealed storage of your belongings.
  2. Pickup Pool Whether you’re looking to add a playful touch to your road trip or entertain your kids at home, creating a pickup pool is a fantastic idea. You can purchase a specialized pickup pool from “Pick-up Pools” or opt for a DIY approach. All you need are a couple of tarps and a garden hose.
  3. DIY Truck Bed Caddy While pickup truck beds are great for accommodating large items, smaller items tend to roll around. To keep them organized and in place, consider creating a simple caddy that can be securely fastened using deck screws.
  4. Convenient Cargo Hook For easy access to items in the pickup truck bed, an old broom handle with a utility hook at the end is a practical solution. The handle can be used to push items in, and the hook helps in pulling them out effortlessly.
  5. DIY Roll-On Bed Liner If you prioritize maintaining a pristine condition for your pickup truck bed or wish to prevent dents and scratches, you may opt to invest in a bed liner or create a DIY roll-on liner yourself.
  6. Secure DIY Truck Bed Storage Solution For convenient access to the pickup truck bed section located right behind the truck cab, contemplate crafting a secure DIY storage unit. This solution ensures that your items stay intact and easily accessible. The resulting dividers can be effortlessly pulled out and stored flat in the back of the bed.
  7. DIY Pickup Truck Bed Camper Cabinet When your truck isn’t occupied with carrying groceries or carpentry materials, and you’re embarking on a camping adventure, consider converting your pickup truck bed into a DIY camper cabinet. This transformation allows you to relish a mini-camper van experience.
  8. Truck Bed Reach Stick When it comes to loading or unloading, reaching certain items can be challenging. If you’re looking to save time and avoid the discomfort of crawling and bending, crafting a truck bed reach stick can be immensely beneficial. All you need is an extension pole with a paint roller attachment.
  9. Truck Bed Hammock After a long day on the road and lacking nearby trees for a traditional hammock setup, utilize the bed of your truck for a comfortable rest. You can set up a hammock without the need for posts or trees, and adding some faux grass beneath the hammock enhances the ambiance.
  10. Slide-Out Truck Kitchen For ultimate kitchen convenience wherever you go, whether it’s camping or tailgating, a slide-out truck kitchen is a game-changer. Crafted by California-based Scout Equipment Co., this ingenious product provides various surfaces, compartments, and appliances, allowing you to prep, cook, serve, and clean up effortlessly. Slide everything out from the bed of your truck when needed and easily conceal it when not in use.
  11. Truck Bed Lights with LED Strips Enhance your tailgating experience or simplify unloading camping gear in the dark with this impressive truck bed hack—incorporating LED strip lights to illuminate the truck bed. Additionally, LED lights can be a valuable addition to your workshop for enhanced visibility.
October 4, 2023 0 comment
0 FacebookTwitterPinterestEmail
Parts

8 Key Insights I Wish I Had Before Attempting a DIY Oil Change

by auto_motivex September 30, 2023
written by auto_motivex

I was instructed in the process of changing the oil in my car by my late father soon after obtaining my driver’s license. Many scorching mornings were spent in our Texas driveway, ensuring that my aging vehicles were in optimal condition. While his guidance was comprehensive, there were valuable insights gained through practical experience for both of us. Although some of these observations may appear obvious, they collectively contribute to a more streamlined DIY oil change process.

Referring to the car manual before initiating any maintenance is a fundamental step. Additionally, it is advantageous to conduct a thorough inspection of the vehicle a day prior to the planned oil change. Are there any components obstructing access to the oil filter? If so, what tools will be necessary to safely displace them and reinstall them afterward?

In modern vehicles, the oil filter is typically conveniently located near the top, but older models may lack such design considerations. Both of my initial cars, Ford models from the mid-1990s, had the oil filter concealed deep below an array of hoses. Accessing these oil filters necessitated extensive trial and error, often consuming more time than the actual oil draining and replacement process.

Most automobiles are equipped with specialized notches or a dedicated jacking plate to provide a secure point of contact for the car jack. In instances where a jacking plate is located underneath the engine, it is crucial to employ a flashlight and conduct a thorough inspection—no, a quadruple verification—that confirms the car jack is not in contact with any other components within the engine compartment.

The vehicle I am currently operating represents my first encounter with a designated jacking plate, as opposed to notches. During my initial attempt to lift the vehicle, I inadvertently made contact with the windshield wiper fluid reservoir, resulting in an unfortunate crack and subsequent leakage of wiper fluid. D’oh!

Stabilize the Rear Wheel Opposite to the Jack Stands To prevent inadvertent movement of the vehicle, position a brick or a piece of wood to stabilize the rear wheel opposite the jack stands. Also, ensure that the parking brake is engaged.

Both Steel and Aluminum Jacks are Viable Despite aluminum often being perceived as less robust and less secure than steel, aluminum jack stands demonstrate adequate durability. Steel jacks, being a more economical option, provide a cost-effective alternative. In summary, either material is suitable for the intended purpose.

Apply Lubricating Oil to the Filter Seal This can be accomplished by applying a small quantity of oil to the filter seal using a fingertip. This step holds significant importance as it aids in maintaining the integrity of the seal during engine startup. I distinctly recall a stern admonishment from my father during my initial attempt at a solo oil change when I contemplated bypassing this pivotal step.

Position a Metal Drip Pan Beneath the Oil Collection Receptacle Safeguard your garage floor or driveway by placing a sizable metal drip pan. It is lightweight, easy to clean, and facilitates moving the oil collection receptacle with ease, allowing for slow sliding without having to go under the car.

Utilize a Transportable Oil Collection Receptacle Ensure the usage of a collection receptacle designed for portability, resembling a jug. Avoid the hassle of pouring used oil from a collection pan into a precarious funnel, a practice prone to creating a mess.

Dispose of the Used Oil Filter Responsibly While my father used to discard used oil filters directly into the trash, current best practices emphasize recycling. Once the oil is drained from the filter, accomplished by puncturing the top dome with a screwdriver, the filter can be recycled. Allow the oil to drain into your collection receptacle. For locating appropriate facilities to recycle used oil and oil filters, Earth911 offers a directory accessible through iRecycleOil.com.

September 30, 2023 0 comment
0 FacebookTwitterPinterestEmail
Parts

Unyielding Bolts Stand No Chance Against This Robust Breaker Bar Set

by auto_motivex September 29, 2023
written by auto_motivex

For the majority of tasks involving stubborn nuts or bolts, a high-quality socket set typically suffices. However, certain tasks demand a bit more torque, such as removing a lawn mower blade for sharpening or loosening lug nuts during tire rotation.

Having struggled with extracting two seized blades from my father-in-law’s lawn tractor, I sought assistance by procuring the Craftsman Three-Piece Flex Handle Breaker Bar Set from a nearby home center. During the Labor Day Weekend, I transported the set to his property, aiming to successfully remove and sharpen the tractor blades.

The Craftsman Three-Piece Flex Handle Breaker Bar Set comprises breaker bars, which are non-ratcheting bars utilized with socket wrenches. Due to their extended length, they possess the capability to loosen exceedingly tight fasteners by generating more torque than standard socket wrenches.

This set incorporates three robust breaker bars made from heavy-duty steel alloy, catering to 1/4-, 3/8-, and 1/2-inch drive sockets. Each breaker bar features a 180-degree rotating head with wave washer joints, ensuring robust resistance across their entire range of motion. Furthermore, they are available in varying lengths: 15 inches for the 1/2-inch drive, 10 inches for the 3/8-inch drive, and six inches for the 1/4-inch drive.

The Craftsman Three-Piece Flex Handle Breaker Bar Set, coated with chrome, exudes a sense of durability and solid construction. Moreover, in line with the Craftsman hand tool range, this set is backed by a lifetime warranty.

Equipped with an angle grinder, sockets, and the Craftsman Three-Piece Flex Handle Breaker Bar Set at my disposal, I seized the opportunity to sharpen as many lawn mower blades as possible over the extended weekend. Additionally, given the need for tire rotations on our family vehicles, I decided to address that task as well.

Commencing with the lawn tractor belonging to my father-in-law, I initiated the process by removing the two worn-out blades using the 1/2-inch drive. Initially, I attempted to dislodge each blade solely using the nine-inch socket wrench handle. However, both blades necessitated the 15-inch breaker bar, with one requiring the added leverage of a pipe.

The 180-degree rotating head emerges as a practical feature, aiding in effortless alignment with the targeted nut. This feature proved immensely beneficial as I maneuvered and applied torque to the socket, breaker bar, and the extended length of the pipe to tackle the stubbornly seized lawn tractor spindle.

Optimal Effectiveness of Breaker Bars Requires Adequate Length

A breaker bar of superior quality necessitates excellent construction and sufficient length to deliver effective results. Notably, the lengths of the 1/4-inch and 3/8-inch breaker bars are comparable to that of my ratchet handles. While they may prove useful in certain circumstances, investing in this set becomes redundant if the same torque can be generated with the existing tools at hand.

On the other hand, the 1/2-inch breaker bar, though longer than my ratchet handle, was the shortest variant available (15 inches). While this length sufficed for the tasks at hand, I would have preferred an 18-inch, 24-inch, or even a 30-inch version for the additional torque that the extra length could provide.

Nonetheless, the Craftsman Three-Piece Flex Handle Breaker Bar Set proved instrumental in successfully removing six lawn mower blades and rotating the tires on two vehicles. Throughout these applications, the torque generated was adequate, except for one instance involving a lawn tractor blade where I required the added leverage of a pipe.

Among the tools in the set, I found myself using the 1/2-inch drive breaker bar most frequently, given its longer length compared to the others, and coincidentally, I possess a set of 1/2-inch drive sockets. My only contention lies in the desire for a slightly greater length for this particular breaker bar. With a slight extension, this set would indeed be perfect.

Pros

  • Comprehensive coverage with three bars for all common socket sizes.
  • Demonstrates solid, high-quality construction.
  • Enhanced usability with a 180-degree rotating head.
  • Assurance of quality with a lifetime warranty.

Cons

  • Limited by relatively short length.
  • Smallest bar has fewer versatile applications.

FAQ Q: Does the set come with a carrying case or bag? A: No. Q: Can a socket adapter be used with the breaker bar? A: Yes, provided you have the correct size adapters, enabling the utilization of various socket sizes with the breaker bar. However, caution is advised against excessive torque, as it may potentially damage the adapter or smaller-walled sockets.

Testimonials With nearly 1,000 five-star reviews on Amazon, the Craftsman Three-Piece Flex Handle Breaker Bar Set has been highly praised. INF1DELx4 enthusiastically remarks, “So glad I bought these. Definitely have come in handy on more than a few occasions.” Another satisfied customer, Kevin K, notes, “While my primary aim was to acquire the 15-inch breaker bar to facilitate the removal of three 15/16-inch lawn mower blades from my 61-inch Hustler mower deck, I was pleased to also receive the smaller 1/4- & 3/8-in. breaker bars. They will undoubtedly prove useful at some point.

Conclusion In summary, the Craftsman Three-Piece Flex Handle Breaker Bar Set proves to be versatile and practical, suitable for a wide range of daily tasks requiring the use of breaker bars. Its convenient swiveling head and exceptional lifetime warranty establish this breaker bar set as an essential tool for individuals with mechanical aptitude, including DIY enthusiasts and budding mechanics.

September 29, 2023 0 comment
0 FacebookTwitterPinterestEmail
Newer Posts
Older Posts

Recent Posts

  • Effective Cleaning Methods for Tonneau Covers
  • Approaches to Retain the Enchanting New – Car Fragrance
  • Optimal Car Trash Can Choices
  • Optimal Strategies for Cleaning and Maintaining Truck Running Boards
  • 环保型机油处理与回收

Recent Comments

  • Korey on What is the Recommended Frequency for Motorcycle Oil Changes?
  • Greg on What is the Recommended Frequency for Motorcycle Oil Changes?
  • Reye on Transporting Cargo with Pickup Trucks
  • mark on How to Properly Hook Up a Trailer?
  • marcus on What is the Recommended Frequency for Motorcycle Oil Changes?
  • Facebook
  • Twitter

@2020 - All Right Reserved. Designed and Developed by Auto-Motivex


Back To Top
Auto Motivex
  • Detailing
  • Motorcycle
  • Parts
  • Truck
  • Utility Trailers
  • Blog