• Detailing
  • Motorcycle
  • Parts
  • Truck
  • Utility Trailers
  • Blog
Auto Motivex
keep your memories alive
Utility Trailers

Winterizing Your Boat and Trailer: A Step-by-Step Guide

by auto_motivex September 27, 2023
written by auto_motivex

Introduction

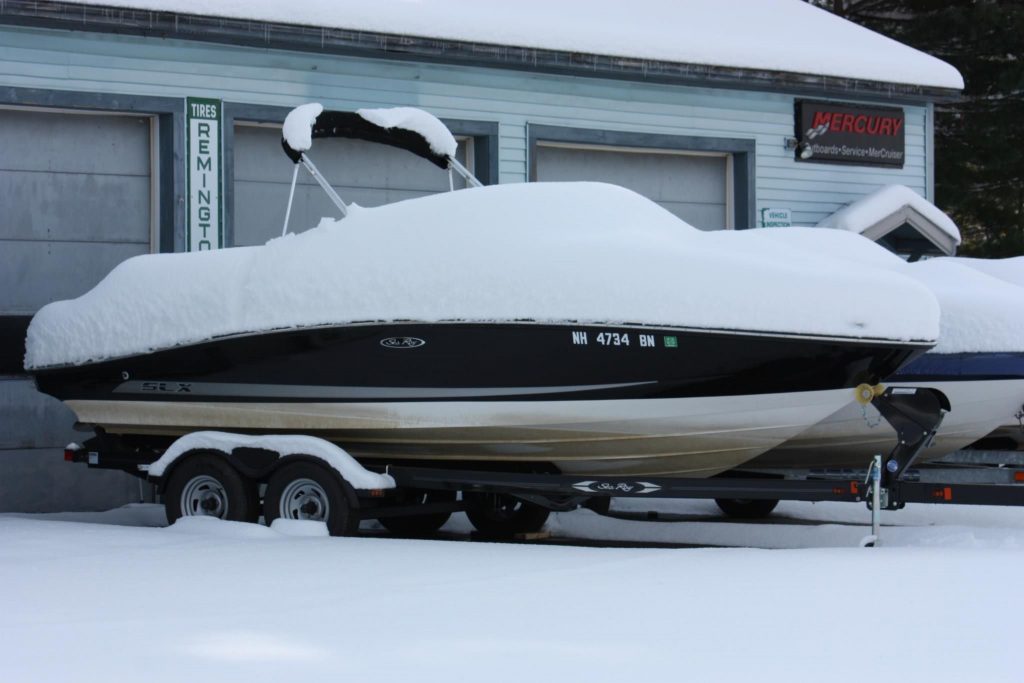
You’ve had a fantastic time on your boat with family and friends all summer, but now it’s time to wrap up the water adventures. If you’re aiming for a repeat of those great times next year and aiming to protect your engine during the cold winter months — minimizing early season startup problems — then keep reading. Note: This how-to guide features a 1999 Bayliner 2050ss Capri with an inboard motor, stored in Northwest Arkansas, a freshwater environment where winter temperatures rarely drop below -10°F. For colder climates, the process is similar, but should involve antifreeze that can withstand the typical winter temperatures there. Consider this a broad overview of the process. Every boat has its unique aspects, each climate demands specific measures, and freshwater and saltwater environments require distinct steps.

Tools Required

  • Battery charger
  • Cleaning rags
  • Flashlight
  • Flathead screwdriver
  • Garden hose
  • Motor flusher engine muffs
  • Thin piece of wire
  • Work gloves
  • Wrench

Materials Required

  • Antifreeze
  • Boat cleaner (any multi-purpose cleaner will work)
  • Fogging oil
  • Fuel stabilizer
  • Gasoline
  • Marine grease
  • Rags

1.Set Up Your Workspace

Select a suitable location for winterizing your boat, preferably a flat and spacious area such as a driveway, ensuring easy access to a hose for convenience during the process.

2.Locate the Drain Plugs

Before initiating the winterization process, locate the drain plugs on the boat. This step is crucial and ensures a smoother winterization. It’s advisable to locate the drain plugs before the engine is hot to ensure safety.Identify the exact location of the drain plugs using the owner’s manual or through online research.

3.Prep the Gas Tank

Prepare the gas tank for the winter by adding fuel stabilizer. This step helps prevent the gasoline from deteriorating during the winter months of inactivity, reducing potential issues during startup in the spring.Follow the instructions provided on the product label for the appropriate amount of stabilizer to use. For instance, we used 3.6 oz. of STA-BIL 360 Marine for our 34-gallon tank.Top up the tank with gasoline to minimize air exposure, which can lead to condensation. Condensation introduces moisture, something you want to avoid in your fuel when spring arrives.

4.Run the Boat

Operate the boat on dry land, following your standard procedure. Locate the water intake, usually situated on the stern drive. Place engine muffs over the water intake and connect a garden hose to run water into the inlet. This step helps prevent overheating. Start the engine and allow it to attain the operating temperature. If you’re unfamiliar with this process, refer to a helpful tutorial.Run the boat for the necessary duration until the gauges indicate reaching the normal operating temperature, typically around 15 minutes. This action opens the thermostat, enabling the circulation of antifreeze throughout the engine.

5.Fog the Engine

Although not universally practiced annually, fogging the engine is highly beneficial as it safeguards the cylinders and carburetor from corrosion. The process is straightforward.While the engine is still warm, apply fogging oil into the carburetor until the engine stops running. The oil effectively suffocates the engine while providing a protective coating of oil on the carburetor and cylinders.We utilized STA-BIL Fogging Oil, a product with a strong reputation. Numerous other brands offering similar products are available in the market.

6.Drain the Engine

Carefully remove each drain plug by hand, and it’s advisable to wear gloves for safety. Be cautious as the engine will be hot, resulting in hot water gushing out when you remove the plugs. Insert a thin wire into the drain hole to dislodge any accumulated debris. Replace the plugs, taking care not to over-tighten, especially since these are typically made of plastic and can break easily.

7.Check and Refill Oil (If Necessary)

Locate the dipstick and check the oil level. If the oil level is low, add oil until it reaches a level above the minimum and below the maximum marks indicated on the dipstick.

8.Drain Hoses and Add Antifreeze

Using a flathead screwdriver, loosen and remove the hose clamps on the thermostat housing, then drain out any remaining water. In boats like ours, which have four hoses (two for the exhaust manifold and two for the block), inspect the housing inlets and outlets for corrosion and apply grease to the metal connection points. Check the hoses for any signs of leakage. Pour antifreeze into each hose until it flows back out through the thermostat housing, ensuring proper winterization. If you reside in a colder climate with temperatures often dropping below zero, use an antifreeze suitable for those conditions. Finally, reinstall the hoses and tighten the hose clamps securely.

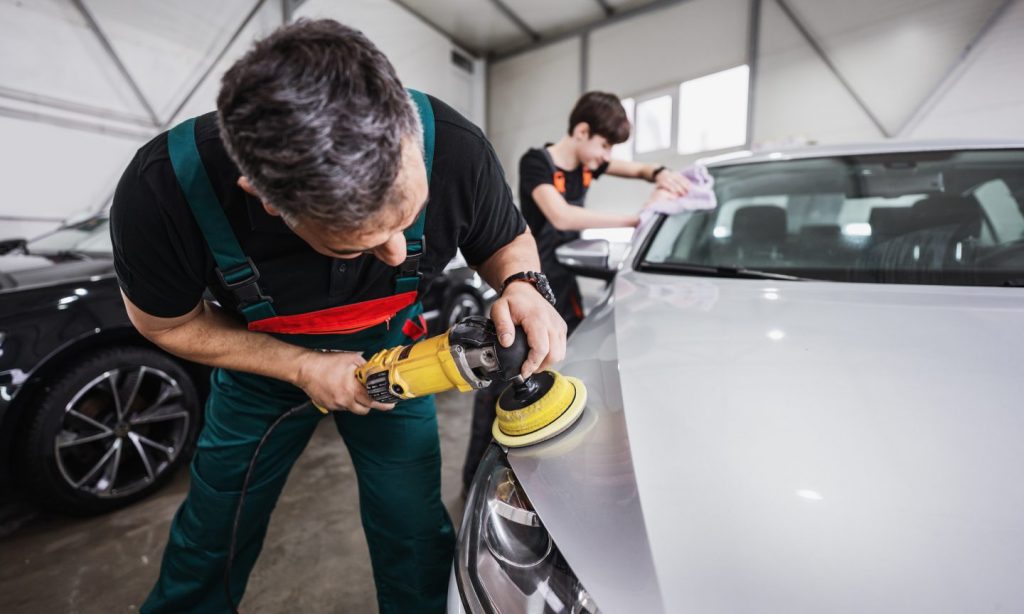
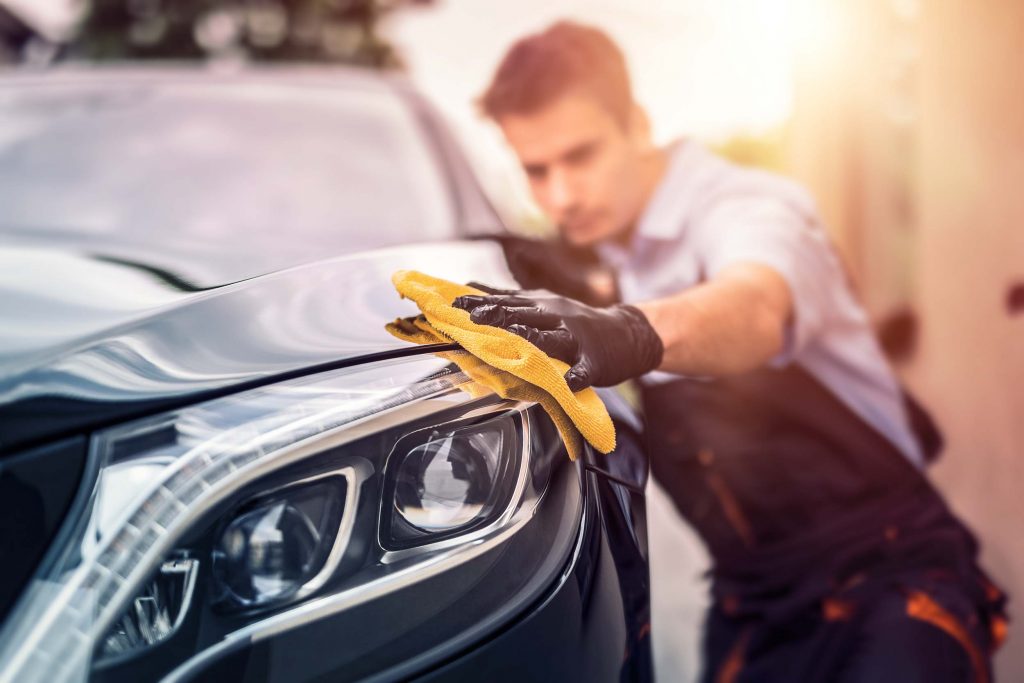
9.Clean the Boat Interior

Although it may seem trivial, this step is highly significant! You’ll appreciate having a clean and organized boat when you open it up next spring. Wipe down the interior using a boat cleaner or multi-purpose cleaner. Consider applying wax to your boat as well. Remove life jackets, water bottles, sunscreen bottles, etc., and store them elsewhere.

10.Remove the Battery

Leaving the battery unused in the cold for months can shorten its lifespan. Remove the nuts from each battery terminal; the specific tools may vary, but we used an 8-mm wrench. Label the positive and negative wires with a piece of tape and a Sharpie for easy reinstallation in the spring. Place the battery in a covered, ideally climate-controlled space, and connect it to a charger.

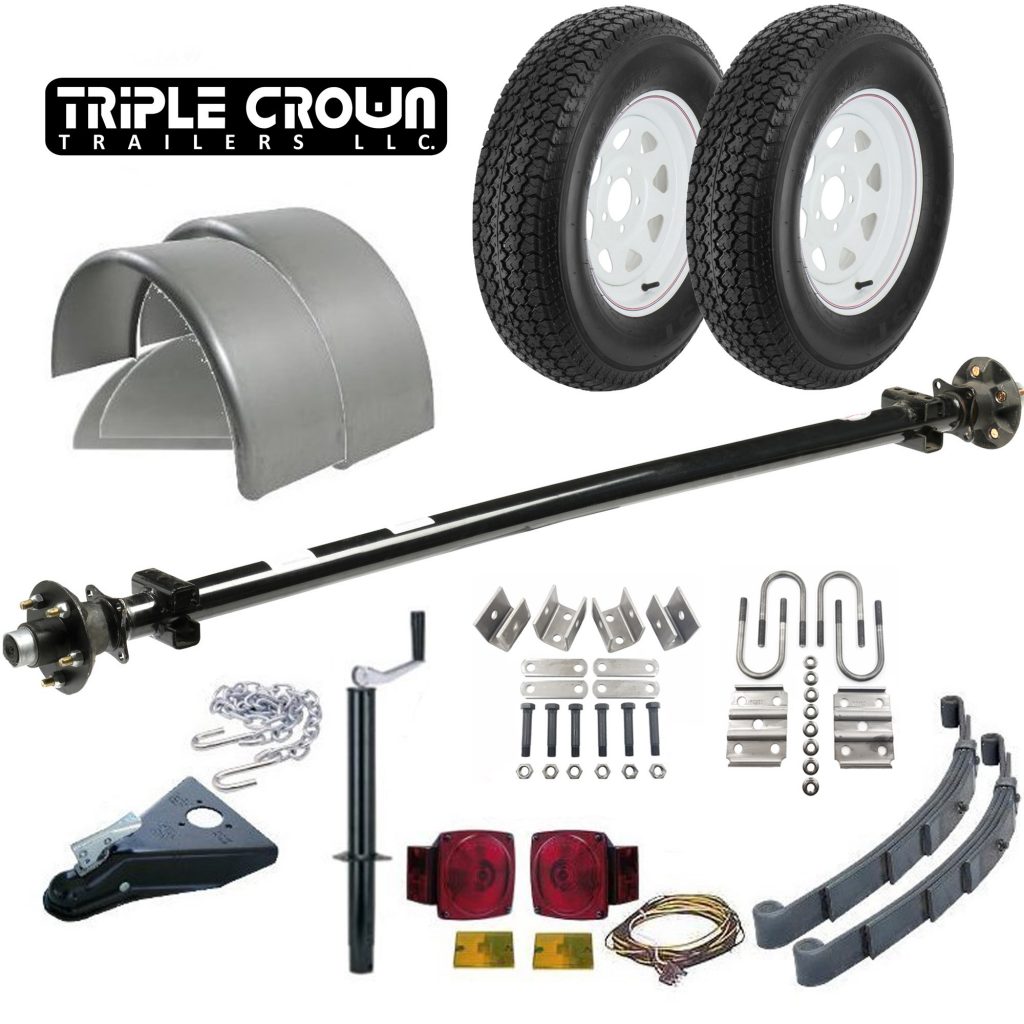
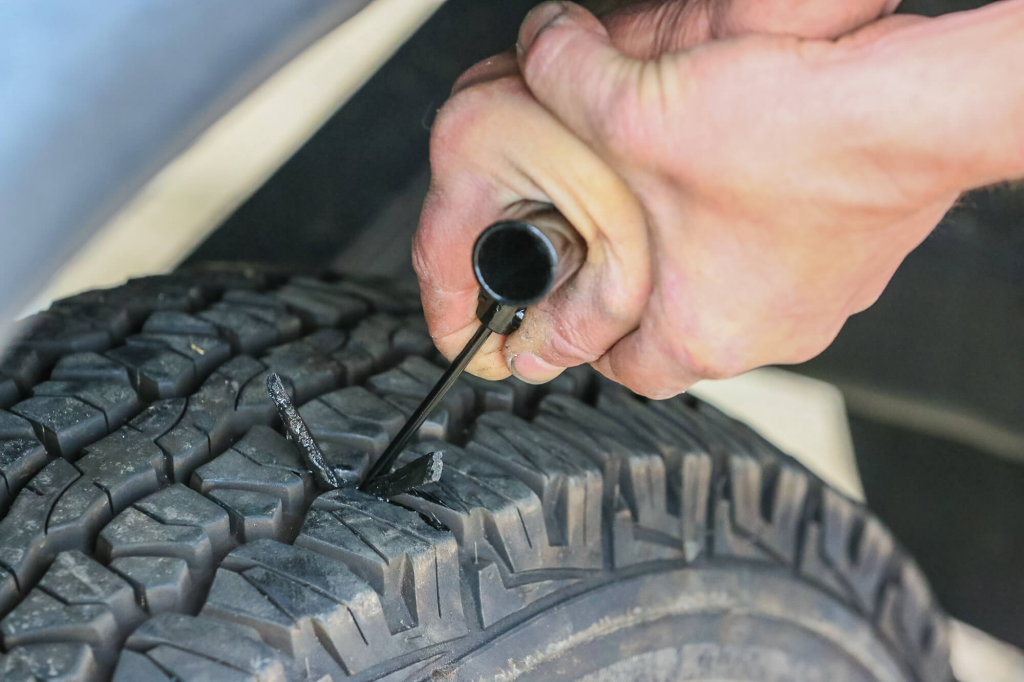
11.Winterize the Trailer

While there’s not much to winterize on the trailer, it’s still crucial. Moving a boat from a neglected trailer can be challenging and inconvenient. Fill up the boat’s fuel tank. A full tank adds extra weight on your tires and allows for a more accurate tire pressure gauge. Keep in mind that each gallon of fuel weighs approximately six pounds. Inflate the tires using an air compressor or at a gas station. Check the tire sidewall for specific pressure recommendations, and do not exceed the maximum pressure rating. Inspect the trailer and bearings for any signs of rust and corrosion. Address these issues now to ensure a smooth storage period for your boat and trailer during winter. Here are some suggestions for winter boat storage.

September 27, 2023 0 comment
0 FacebookTwitterPinterestEmail
Truck

Safe Truck Jacking Techniques

by auto_motivex September 26, 2023
written by auto_motivex

Jacking up a truck safely is essential for various maintenance and repair tasks. Whether changing a tire or conducting undercarriage inspections, using correct techniques is paramount for personal safety and preventing damage to the vehicle. This article outlines safe truck jacking techniques to ensure a secure and stable work environment when performing maintenance procedures.

Follow these steps to elevate your truck securely and prepare for maintenance or repairs.Proper truck jacking is a fundamental skill for any vehicle owner or mechanic. It involves lifting the truck securely off the ground using hydraulic jacks or other lifting devices, allowing access to the undercarriage for repairs or maintenance. However, inadequate or incorrect jacking procedures can result in accidents or damage to the vehicle.

Mastering the correct technique to safely elevate and stabilize your truck before embarking on oil changes or repair work is essential for ensuring your safety. It’s crucial to understand that various vehicles have distinct support points, so begin by referring to the owner’s manual.

Ensuring the safety of your truck during the jacking process is of utmost importance. Acquiring the knowledge and skills to lift your truck safely and perform your own repairs and maintenance not only allows for cost savings but also promotes long-term well-being. To guarantee a safe and secure process, familiarize yourself with car jack safety guidelines.

Find a Level Surface Begin by parking your truck on a flat, even concrete surface. Pro Tip: If you’re working on an asphalt surface, utilize plywood support plates under the jack stands.

Understand Different Vehicle Constructions Trucks and most SUVs possess sturdy steel frames that provide structural support for the entire vehicle. Conversely, the majority of cars are constructed using a “unibody” design, lacking a separate frame. Consequently, each type of vehicle necessitates distinct support points for the proper placement of jacks and jack stands.

Refer to the Vehicle Manual For accurate guidance on the correct jacking procedure for your truck, refer to the vehicle’s repair manual to identify the recommended lift points and appropriate support locations. Repair manuals can typically be obtained from auto parts stores or online sources. Before initiating the jacking process, engage the parking brake and use wheel chocks at the rear to prevent any unintended movement.

Initiate Jacking from the Front Commence the jacking process from the front of the vehicle. For four-wheel-drive trucks, lift the front end by positioning the jack under the differential. Pro Tip: When dealing with two-wheel-drive trucks, place the jack under the designated jacking pad beneath the engine.

Lifting the Truck with the Jack Position the jack in a way that aligns the cross member or differential with the recessed section of the jack saddle. Gently pump the jack handle until the front wheels are off the ground, then pause to verify the jack’s placement. Inspect the front of the vehicle to ensure it remains level without leaning to either side. If there’s a lean, carefully lower and reposition the jack. If not, proceed to pump until the vehicle reaches the desired elevation.

Placing the Jack Stands Provide support for the front of the truck by positioning the jack stands directly under the frame. For the rear, position a jack stand under each axle. Gradually turn the handle until the vehicle begins to descend. Avoid a quick release, which could cause an abrupt and unsafe drop. Lower the truck until it’s nearly touching the saddle of the jack stand. Then, perform any necessary final adjustments before transferring the full weight onto the stand. Remove the floor jack and relocate it to the rear of the vehicle. Identify the designated rear lift point as indicated in the manual, and repeat the jacking process for the rear of the vehicle. Place the two rear jack stands in appropriate support positions and gently lower the rear onto these stands.

Verify the Stability of Support Points Once the vehicle is elevated on all four jack stands, carefully sway it from side to side and up and down. This step confirms that the vehicle is securely positioned on the jack stands and that the jack stand saddles are making complete contact with the designated support points. If any instability or wobbling is noticed, halt immediately and readjust the problematic jack stand before attempting to work underneath the vehicle.

Pro Tip: If you intend to remove the tires, slightly loosen the lug nuts while the truck is still on the ground. This precaution prevents the wheels from turning while using the lug wrench after the truck has been raised.

Verifying Stability: Before working under the truck, gently shake it to confirm that it is stable on the jack stands. Any wobbling or instability indicates a need for readjustment.

Preparing for Tire Removal: If planning to remove the tires, slightly loosen the lug nuts while the truck is on the ground. This will prevent the wheels from spinning when removing the tires after jacking.

Conclusion: Safe truck jacking is a crucial aspect of vehicle maintenance and repair. Adhering to proper techniques and safety precautions ensures a secure work environment, preventing accidents and damage to the vehicle. Always prioritize safety by using appropriate equipment and following the manufacturer’s recommendations for vehicle jacking.

September 26, 2023 0 comment
0 FacebookTwitterPinterestEmail
Detailing

Car Detailing Costs: Is DIY the More Affordable Option?

by auto_motivex September 25, 2023
written by auto_motivex

Wishing your car looked as good as new? Car detailing can help you achieve that, but you need to decide whether you want to do it yourself or hire a professional. Regular car detailing is highly beneficial in preventing your car from deteriorating. It helps maintain the resale value and even enhances safety. For instance, clean windows and headlights improve visibility.If you’re contemplating between doing it yourself or hiring professionals, weigh the pros and cons. This will help you decide, considering that DIY car detailing can be more cost-effective.

Car detailing involves the comprehensive restoration of a vehicle to achieve a condition that matches or surpasses its original state. It goes beyond mere surface cleaning, encompassing meticulous treatment for scratches, chips, cracks, signs of aging, wear, and thorough cleansing of dirt, dust, and grime from both the exterior and interior.Notably, car detailing is a manual process, distinct from automated car washes. The ultimate outcome is a flawless vehicle that appears as if it has just been freshly manufactured. For visual insights into the transformative effects of car detailing, one can refer to before and after car detailing photos.

Exterior detailing primarily focuses on enhancing and safeguarding the vehicle’s paint. This involves the elimination of scratches, correction of swirls and chips, and the repair of rust and oxidation. The process of exterior detailing includes the following steps after a thorough exterior wash and rinse:

  1. Paint Claying: Utilizing a clay bar to remove residue and contaminants from the paint.
  2. Polishing: Removing layers of clear coat to eliminate scratches and swirls.
  3. Waxing: Applying a wax coating to achieve a glossy finish and an additional layer of protection. An upgrade to ceramic coating or PPF (paint protection film) can provide enhanced defense against elements such as UV rays, acid rain, rocks, insects, and bird droppings.

Additionally, one can opt for paint correction to address significant imperfections like oxidation and stains. Genuine paint correction involves the use of machinery or sandpaper, potentially extending the detailing process beyond the typical duration of two to four hours for a car’s exterior.

Interior detailing encompasses a range of tasks aimed at revitalizing the interior of a vehicle. This involves the following key steps:

  1. Vacuuming: Thorough vacuuming is performed both at the outset and conclusion of the detailing process. An air compressor might be utilized to access the smallest and most hard-to-reach crevices.
  2. Shampooing and Steam Cleaning: The upholstery, carpet, and floor mats are cleaned using shampooing and/or steam-cleaning techniques.
  3. Leather Care: Cleaning and conditioning treatments are applied to leather surfaces.
  4. Interior Glass Cleaning: Comprehensive cleaning of interior glass surfaces is carried out to achieve a clear and streak-free finish.
  5. Wipe-Down: Surfaces within the interior are meticulously wiped down to eliminate dirt and dust.
  6. Air Freshening: The interior is treated with air fresheners to enhance the overall ambiance.

These steps ensure a thorough cleaning and rejuvenation of the vehicle’s interior, enhancing the comfort and aesthetics of the space.

The average cost of car detailing is approximately $160, as indicated by a 2020 study conducted by Mobile Tech RX. This cost can vary depending on the size and condition of the vehicle, with SUVs and vans typically incurring an additional charge of approximately $50. Professional car detailing services often provide a range of service packages, with prices varying from $20 to $200 or even higher, based on the extent and complexity of the services rendered.

Professionals save you time. A standard professional car detailing session for a well-maintained car usually spans between two to four hours. If you were to undertake the same detailing process yourself, it could easily take at least twice as long. Moreover, if you prefer not to leave your car at the detailing shop, certain companies offer the convenience of mobile car detailing, where they come to your home to perform the service.Professionals also help you save money, especially when it comes to advanced services requiring specialized detailing tools, such as paint correction and engine detailing. These specialized services can be more costly and challenging to perform without professional expertise and the right equipment.

DIY car detailing can be tailored to fit your budget, as the cost varies based on the cleaning compounds and tools you choose, such as car buffers and upholstery steamers, which offer a wide array of options.For instance, car buffers come in a broad price range, from more affordable options to higher-end ones. Upholstery steamers, a key tool for interior cleaning, typically start at around $100 (for instance, this Bissell bestseller is priced at $120). In terms of interior cleaning compounds, cleaners, and cloths, investing in a comprehensive car detailing kit is a practical starting point, such as the kit offered by Meguiar’s.The advantage of investing in these tools and cleaning products is that they can be utilized for multiple cleaning sessions, ultimately saving you money. However, it’s essential to weigh this against the value of your time when deciding how much you’re willing to invest.

DIY car detailing can lead to cost savings provided you’re willing to make an initial investment in the necessary supplies.Additionally, DIY car detailing offers you the flexibility to focus on the most heavily soiled areas of your vehicle. You have the option to conduct a thorough or partial detailing, addressing specific stains and scratches as they occur.

September 25, 2023 0 comment
0 FacebookTwitterPinterestEmail
Detailing

Top 13 Car Detailing Tools: A Comprehensive Guide

by auto_motivex September 25, 2023
written by auto_motivex

Professional auto detailers highly recommend these car detailing tools to maintain the pristine appearance of their vehicles.

Pressure Washer A

pressure washer utilizes high-pressure water expelled through a small nozzle, providing a powerful means to eliminate stubborn and adhered grime without the need for excessive manual effort. Moreover, you can opt to incorporate car soap into the pressure washer, enabling a convenient alternative to manual hand-washing. Will Creech, a reputable detailer and blogger at DetailDIY.com, recommends the Karcher K1700 Pressure Washer, an electric model boasting a maximum pounds per square inch (PSI) of 1,700. Creech deems it an excellent choice, particularly for sporadic use throughout the year, emphasizing its favorable warranty terms.

Foam Gun

For those not looking to make the investment in a pressure washer, Creech suggests considering a foam gun attachment for your garden hose as a cost-effective alternative. Simply fill the canister with water and a few ounces of car soap, switch on the hose, and spray a substantial layer of foam onto your vehicle. Creech specifically recommends Adam’s Foam Gun, offering the flexibility to opt for either a concentrated stream or a broad fan of foam, allowing control over the water-to-soap ratio during application.

Grit Guards

If you adhere to the traditional two-bucket car wash method, grit guards are indispensable, according to Creech. They act as a filtration system for your soapy water bucket, preventing dirt from contaminating the water and potentially causing scratches during the washing process. Simply place a grit guard at the bottom of your bucket and run your mitt or sponge against it to dislodge the dirt, which is then trapped beneath the guard. This ensures that the soapy water above remains clean and suitable for washing. Creech recommends the Dirt Trap Cyclones by Chemical Guys, lauding their effectiveness in trapping dirt at the bottom due to nearly 300 funnel-shaped traps.

Car Dryer

Car dryers are highly efficient in drying car interiors and hard-to-reach areas such as side mirrors and door jambs. Residual water in these crevices can later leak, causing stubborn and challenging water spots. Creech specifically favors the MetroVac Air Force Blaster Car and Motorcycle Dryer. Weighing only three lbs., this dryer expels air at an impressive rate of 18,000 feet per minute. Additionally, it filters and slightly heats the air to approximately 30°F above the ambient temperature.

Microfiber Mitts and Towels Microfiber,

composed of polyester and nylon, features threads that are finer than 10 micrometers in diameter, even surpassing the fineness of human hair. Creech emphasizes the significance of microfiber mitts and sponges in preventing fine scratches and swirls in a car’s clear coat. He highly recommends stocking up on microfiber towels and mitts from The Rag Company, highlighting the exceptional absorbency of their Dry Me a River towel.

Car Vacuum

Vacuums are indispensable for the thorough removal of loose particles from a car’s interior. While a household vacuum can be utilized outdoors, a dedicated car vacuum is more suitable for this purpose. Creech speaks highly of the Metrovac Vac N’ Blo Car Detailing Vacuum, which not only vacuums but also acts as a dryer, effectively removing water from tight spots and crevices. This proactive measure helps prevent water spots that could potentially damage the car’s clear coat. For those unsure about justifying the cost of the Metrovac, which exceeds $300, a shop vacuum like the Armor All Wet/Dry Utility Shop Vac can also suffice. This versatile option can be used for vacuuming the garage and workshop in addition to car cleaning tasks.

Car Detailing Steamer

A handheld steam cleaner directs steam precisely where needed, effectively loosening and removing the most stubborn and stuck-on residues (picture chewing gum pressed into your cupholder). Alex Killingsworth, a service consultant at Superior Honda in New Orleans, emphasizes the necessity of a steamer. The Bissell SteamShot stands out as a customer favorite on Amazon, boasting over 15,000 five-star reviews. It is equipped with a jet nozzle and brush attachment, also ideal for grout cleaning!

Car Polisher

Polishers are essential for smoothing out paint imperfections. Random orbital polishers replicate a hand-polishing motion and are beginner-friendly. Steve Evans, owner of Tampa Boat Detailing, recommends the Shurhold Pro Rotary Polisher. Evans applauds the durability and user-friendliness of his Shurhold polisher, yielding exceptional results.

Boar’s Hair Detailing

Brushes Experts like Dennis Donchev, the proprietor of La Jolla Mobile Car Detail, opt for boar’s hair due to its robustness in cleaning while being gentle enough not to cause scratches. Boar’s hair brushes are ideal for cleaning tires, wheel faces, engine bays, inner doors, weather stripping, and even your dashboard.

September 25, 2023 0 comment
0 FacebookTwitterPinterestEmail
Motorcycle

Maximizing Garage Space: A Guide to Motorcycle Lifts

by auto_motivex September 24, 2023
written by auto_motivex

One significant factor that dissuades potential motorcycle buyers is the dilemma of sacrificing a car parking spot to make room for the bike.Motorcycles epitomize the exhilaration of open-road adventures and stand as a symbol of freedom for countless enthusiasts. However, they often pose storage challenges, particularly for individuals dealing with constrained garage space. If the notion of relegating your car to the outdoors to accommodate your motorcycle doesn’t sit well with you, a motorcycle storage lift could present an effective solution.

Surveys reveal that storage issues pose a notable hurdle for prospective motorcycle purchasers. A considerable number are apprehensive about the prospect of leaving their cars exposed to the elements merely to accommodate a new motorcycle. A motorcycle lift presents a favorable solution, enabling the safe sharing of garage space for both the motorcycle and car.

Features of the Store-It System from Garage Evolution:

  1. Lifting Capability: The system can elevate motorcycles, ATVs, or even riding mowers weighing up to 1,200 lbs, ensuring versatility in usage.
  2. Platform Size: With dimensions of 4 x 8 ft., the platform provides ample space for most standard-sized motorcycles and equipment.
  3. Power Source: The 7-amp, 110-volt motor easily operates through a standard household receptacle. This eliminates the need for any specialized wiring or an electrician’s services.
  4. Safety Features: Equipped with sensors, the motor detects if the load exceeds the permissible limit, preventing operation in such instances and ensuring safety.
  5. Installation: DIY enthusiasts will appreciate that the lift can be installed in approximately two hours using basic hand tools and a drill.
  6. Seasonal Usage Flexibility: During biking season, when your motorcycle is frequently on the road, the platform can be repurposed for storing winter equipment. Alternatively, you can fold it against the wall to further maximize space.

FAQs on Motorcycle Garage Lifts:

  1. How safe are motorcycle lifts? Most modern lifts, such as the Store-It system, come equipped with built-in safety features. Motor sensors prevent overloading, and quality lifts are constructed with durable materials to ensure stability.
  2. Can the lift handle other equipment? Yes, many lifts can accommodate equipment like riding mowers and four-wheelers, as long as they fall within the weight limit.
  3. Do I need a professional for installation? While some may prefer professional installation for peace of mind, many systems are designed for DIY installation using common tools.
  4. How much maintenance does a lift require? Regularly inspect the cables, motor, and other components for signs of wear and tear. Additionally, ensure that the safety features are functioning correctly.
  5. Where can I purchase a quality lift system? Several manufacturers specialize in garage lift systems. For the Store-It system mentioned, please visit garageevolution.net for more information and dealer locations.

Conclusion: In summary, a motorcycle garage lift not only maximizes space but also offers a secure storage solution for your cherished two-wheeler. Whether you’re a seasoned rider or a novice, guaranteeing that your garage can accommodate all your vehicles without any compromises is a significant advantage. Therefore, equip yourself and delve into the realm of motorcycle lifts, ensuring that storage concerns never impede your enthusiasm for riding.

Maximizing Garage Space with Motorcycle Lifts: A Practical GuideGarages often serve as multipurpose spaces, housing not only our vehicles but also functioning as workshops, storage areas, and sometimes even an additional living space. However, with the increasing number of belongings and vehicles, especially for motorcycle enthusiasts, utilizing garage space efficiently has become a necessity. One effective solution is employing motorcycle lifts to create more room and maintain an organized garage.

  1. Understanding Motorcycle Lifts: Motorcycle lifts are specialized systems designed to elevate motorcycles, creating space beneath. These lifts vary in design and lifting capacity, catering to different types and sizes of motorcycles.
  2. Choosing the Right Lift: Select a lift that suits your motorcycle’s weight and dimensions, ensuring it fits well within your garage. Consider features like lifting mechanism (hydraulic, pneumatic, or electric), lifting capacity, and safety features.
  3. Optimizing Vertical Space: Utilize the vertical space in your garage by installing a ceiling-mounted motorcycle lift. This elevates the motorcycle and allows room for other vehicles or storage below.
  4. Utilizing Overhead Space: Implement a pulley system or winch to hoist your motorcycle to the ceiling, freeing up floor space. This approach is cost-effective and straightforward to install.
  5. Investing in a Storage Lift: Consider a multi-purpose lift that not only raises your motorcycle but also provides storage space above. This is ideal for seasonal items or tools, keeping your garage organized.
  6. Creating a Multi-Level Storage System: Install a lift with multiple levels, accommodating both your motorcycle and providing additional storage. This allows efficient use of space while keeping everything accessible.
  7. Implementing Wall-Mounted Lifts: Wall-mounted lifts can secure your motorcycle against the wall, freeing up valuable floor space. Opt for lifts that allow easy maneuvering and access to your motorcycle.
  8. Regular Maintenance and Safety Checks: Ensure your motorcycle lift is in optimal working condition by conducting routine maintenance and safety inspections. Address any issues promptly to guarantee safe and efficient usage.

By integrating motorcycle lifts into your garage organization plan, you can maximize space, enhance safety, and keep your belongings organized. Tailoring the lift choice to your specific needs and garage layout is essential for achieving an efficient and functional garage space.

September 24, 2023 0 comment
0 FacebookTwitterPinterestEmail
Utility Trailers

Key Trailer Gear and Essential Accessories

by auto_motivex September 24, 2023
written by auto_motivex

No More Bruised Shins: Protecting Your Shins with Essential Trailer Gear,Everyone has experienced it – accidentally bumping into the ball mount and ending up with a painful bruise on the shin. Minimize the impact by equipping your ball mount with a ShinShield protective rubber cushion. This cushion is designed to curve downward, effectively preventing contact with both the sides of the ball mount and the ball stud.

Bungee Tie-Downs: Streamlining Trailer Security,To secure the contents within the trailer, we employ ratcheting tie-down straps. The trailer features tie loops on each side, providing ideal attachment points. However, when attempting to hook the first tie-down to a loop, it often slips off before we can reach the other side, resembling a scene from “The Three Stooges.Recently, we discovered a solution known as Hook-Tight, a product designed to hold straps and bungees in place during the securing process. Hook-Tight can be acquired from select home centers or purchased online in packs of four. Its effectiveness makes it a worthwhile investment.

The Top Trailer Hitch Camera: iBall Trailer Hitch Camera,Even with assistance from a spotter, aligning a trailer can be a cumbersome task. For those seeking to simplify this process, the iBall trailer hitch camera presents an excellent solution. The monitoring unit conveniently plugs into the truck’s power port, commonly known as the cigarette lighter. Moreover, the camera comes with a magnet, allowing for secure attachment to either the truck or the trailer. In our testing, we opted to affix it to the top of the tailgate, providing a comprehensive overhead view.

Aluminum Trailer Jack for Tandem Wheels: EZ Jack,For trailers featuring tandem wheels, the wedge-shaped aluminum EZ Jack (available at Cabelas) proves to be an excellent choice. Here’s a step-by-step guide on how to utilize it effectively,Begin by loosening the lug nuts on the flat tire.Insert the EZ Jack beneath the inflated front tire, then pull the entire trailer forward (or position it on the back wheel and drive in reverse if the front tire is flat).Secure the opposite side with chocks.Proceed to replace the tires.Afterwards, stow the lightweight EZ Jack in your truck, and you’re all set to continue your journey.

Emergency Trailer Lighting Solutions,If you own a trailer, encountering issues with taillights is a common occurrence. To prepare for such situations, it’s advisable to keep a battery-powered bicycle taillight in your vehicle. In the event of a taillight failure, securely attach the bike light to your trailer. This will serve as a temporary alert for vehicles following you (and ideally deter any potential attention from law enforcement). However, it’s essential not to consider this a permanent fix. It’s crucial to promptly address and rectify the taillight problem.Bonus tip: Ensure you have a spare tire and a wrench suitable for the lug nuts on your trailer wheels. Do not assume that your truck’s lug wrench will fit.

Enhanced Trailer Accessibility,Facilitating the loading and unloading of tools and materials from a truck bed, the HitchMate Truck Step proves to be an invaluable tool. Easily insert it into any standard 2-inch trailer hitch receiver and secure it with the lock pin. Release the spring-loaded retainer knob and extend the bar fully, reaching a length of 23-1/2 inches. This strategic positioning places the step precisely where you require it—right at the end of your open tailgate. Once you’ve completed your task, simply flip up the step, retract the retaining pin, and neatly stow the entire unit under your truck bed for future use.

Removing a Stubborn Ball Mount,Dealing with a rusted ball mount on your trailer hitch requires a strategic approach rather than brute force. Acquire a can of CRC Freeze Off penetrating spray, an air chisel, and a hammer bit to execute the following procedure:

  1. Begin by applying CRC Freeze Off spray into the hitch receiver’s opening. This penetrating fluid chills the metal, inducing contraction and aiding in breaking the rust seal.
  2. Utilize the air chisel with the hammer bit to dislodge the rusted components. The air hammer effectively breaks up the rust, facilitates the spread of the penetrant, and ultimately releases the ball mount.
  3. Once the ball mount is freed, gently tap it out with a hammer. If you intend to reuse the rusted mount, consider applying a coat of rust converter or waterproof marine grease for protection.

High-Strength Steel Trailer Locks,Trailer thieves easily bypass standard coupler “latch locks,” finding them no challenge as they can be effortlessly cut with small bolt cutters. For genuine protection, opt for a coupler lock that poses a significant challenge to potential thieves. One exemplary choice is the Trimax Universal Coupler Lock. Simply insert the ball into the coupler and slide on the U-bracket. Unless a thief has the time and tools to unbolt the entire coupler and install a new one, your trailer remains securely protected.

Preventing Trailer Theft,For those with high-value trailers, enhancing security with an additional layer of protection is a wise move. Consider employing a “boot” style lock alongside the standard coupler lock. Various styles are available, but a recommended model is the Trimax TCL75 Wheel Chock Lock. Not only does it provide a formidable lock, but it also acts as a wheel chock to prevent the trailer from moving. Simply slide it onto the wheel and engage the lock cylinder.

September 24, 2023 0 comment
0 FacebookTwitterPinterestEmail
Parts

How to Replace a Motorcycle Chain and Sprockets

by auto_motivex September 23, 2023
written by auto_motivex

The longevity of motorcycle sprockets and chains heavily relies on regular maintenance, including thorough cleaning, proper lubrication, and precise adjustment. However, despite diligent upkeep, chains inevitably wear over time, subsequently causing wear on both sprockets. When one sprocket displays signs of wear, it is advisable to replace both the chain and both sprockets simultaneously

Loosening the Sprocket Nut: Attach a deep socket to a 1/2-inch-drive breaker bar and loosen the nut securing the drive sprocket. If the rear wheel begins to turn, have someone sit on the bike to create resistance. To access the drive sprocket and nut, remove the transmission cover. The nut is typically secured with metal tabs, so bend them down before attempting to loosen the nut. With the rear wheel on the ground, use a breaker bar and socket to loosen the nut. Subsequently, elevate and stabilize the bike using its built-in stand, blocks and jack stands, or a motorcycle jack. A motorcycle jack is the safest option as it provides optimal side-to-side stability.

Adjusting the Rear Wheel and Removing the Chain: Place a socket or wrench on the axle nut and loosen it. Proceed to unscrew the chain-tensioning bolt, elevate the adjuster, and push the rear wheel forward within the slotted swing arm. Ease the tension on the chain by loosening the chain adjusting bolt and the rear axle nut. Push the rear wheel forward to remove the chain. If the chain possesses a master link, carefully remove the clip using a pair of pliers and disassemble the chain. If your chain doesn’t feature a master link, utilize a chain-breaking tool. Install the tool and break the chain, then dispose of the old chain. Following this, disconnect the rear drum brake linkage and the stay. If your bike utilizes disc brakes, remove the caliper. Proceed to slide the rear axle out and detach the rear wheel and brake assembly. Position the wheel on a workbench and replace the rear sprocket, followed by replacing the drive sprocket on the transmission

Installing the Chain and Finalizing the Setup: Carefully slide the master link pins into the chain ends, then proceed to install the outer plate and secure it with the provided clip. Mount the rear wheel, axle, and brake assembly back onto the bike. Ensure the rear wheel is pushed all the way forward in the swing arm and snugly secure the axle nut to maintain this position. Roll the new chain around the drive sprocket and onto the rear sprocket, ensuring the open link is positioned near the top of the rear sprocket. Install the master link. Subsequently, adjust the chain by tightening the chain-adjusting bolts to achieve a 1-inch up/down play on the lower section of the chain. It’s better to err on the side of being slightly loose rather than overly tight. Align the rear wheel correctly. Use a torque wrench to tighten the axle nut to the specified torque and insert the cotter key, if applicable. Torque the drive sprocket nut to specification and bend the tabs against the flats of the nut. Finally, reinstall the transmission covers.

In common with other industries, the motorcycle parts market is saturated with inferior imitations and counterfeit name brand parts that fail to meet the original manufacturers’ specifications. This underscores the importance of purchasing parts from authorized dealers or reputable repair shops. If you opt to shop online, carefully review the seller’s ratings and feedback. A significantly low price for a name brand part should raise concerns about its authenticity.

Apply spray chain lubricant to lubricate the chain, and rotate the wheel several times to facilitate its penetration into the links. Subsequently, ride the bike at a slow pace to shed off any excess lubricant before accelerating.

Replacing a motorcycle chain and sprockets is a crucial maintenance task to ensure optimal performance and safety. The chain and sprockets are integral components that facilitate power transfer from the engine to the rear wheel, influencing acceleration, speed, and overall bike performance. Over time, wear and tear can occur, necessitating replacement for smooth operation and longevity.

September 23, 2023 0 comment
0 FacebookTwitterPinterestEmail
Motorcycle

How Do Motorcycle Brakes Function?

by auto_motivex September 23, 2023
written by auto_motivex


Understanding the functioning of motorcycle brakes is crucial for enhancing your skills as a rider. Here’s an overview of the braking mechanism on your motorcycle.The braking systems in motorcycles typically resemble the disc brake mechanism found in cars. While a few motorcycles use a drum brake, the predominant brake systems on both the front and rear wheels in today’s motorcycles are disc brakes.

Brake Configuration The primary distinction in braking systems lies in the method of brake activation. In a car, the brake pedal triggers all brakes simultaneously. Conversely, on a motorcycle, there are a couple of approaches. In most motorcycles, the braking system activates the two wheels independently. A lever on the right side of the handlebar controls the front brake, while a foot pedal on the right side operates the rear brake. This separation allows the rider to engage the front brakes initially (which handle approximately 70 percent of the braking load), enhancing safety in various scenarios. Another configuration involves triggering both brakes using the handlebar lever, automatically delaying the engagement of the rear brake for the rider. The safety advantages of this configuration are a topic of discussion among riders, largely influenced by personal preference.


How Motorcycle Brakes Function Regardless of the method used to trigger motorcycle brakes, they operate in a similar manner: either a cable or a lever engages the master cylinder, initiating a piston’s action to apply pressure on the brake fluid. As brake fluid is incompressible, this pressure is then transmitted through the brake lines to another piston within the brake caliper. The caliper, in turn, applies pressure on the brake pads. This pressure causes the brake pads to clamp down on the rotor, which is connected to the wheel. The resulting friction between the rotor and the pads converts the motorcycle’s kinetic energy into heat, consequently decelerating the bike. Given that motorcycle wheels are entirely exposed to the environment, the rotors and pads efficiently dissipate this generated heat. The inclusion of brake boosters is unnecessary for all but the heaviest motorcycle models. The majority of riders can exert sufficient force for braking due to the lighter mass of a motorcycle.


A Note on Rotors It’s evident that motorcycle brake rotors are seldom solid, smooth discs. The exposed design, advantageous for efficient air cooling, also makes them susceptible to water from various environmental sources and wet roads. Incorporating slots and cross-drilling is a safety measure to channel water (including steam generated from contact with hot rotors) away from the rotor. This prevents any interference with rotor/pad contact and preserves brake efficiency.

The brake configuration in motorcycles differs from that of cars. While a car’s brake pedal activates all brakes simultaneously, motorcycles typically have two separate controls for the front and rear brakes. A lever on the right side of the handlebar operates the front brake, while a foot pedal on the right side controls the rear brake. This setup allows the rider to engage the front brake first, which is responsible for about 70% of the braking load, enhancing safety in various riding scenarios.

Understanding the working mechanism of motorcycle brakes is essential for riders to effectively use them. When a rider applies the brakes, a cable or lever engages the master cylinder, initiating a piston’s movement to exert pressure on the brake fluid. Brake fluid, being incompressible, transmits this pressure through brake lines to a piston in the brake caliper. The caliper then applies pressure on the brake pads, causing them to pinch the rotor attached to the wheel. This generates friction, converting the motorcycle’s kinetic energy into heat, subsequently slowing down the bike.

Motorcycle brake rotors are designed with slots and cross-drilling to enhance safety. These features help disperse water and steam, preventing interference with rotor and pad contact, thus maintaining brake efficiency even in wet conditions.

September 23, 2023 0 comment
0 FacebookTwitterPinterestEmail
Truck

The Top 2 Snow Tires for Trucks

by auto_motivex September 22, 2023
written by auto_motivex

“While there are established winter driving best practices to ensure safety, choosing the optimal snow tires for your truck requires careful consideration of the following factors:

  1. Cost: Evaluate the price and assess if the investment is justified by the tire’s quality and performance.
  2. Application: Different types of tires—economy, performance, winter, off-road, and all-season—have distinct characteristics to meet varied needs.
  3. Road noise: Consider the noise level generated by the tire while driving, a factor that can significantly impact comfort during your journeys.
  4. Tread wear: Assess the expected lifespan of the tire, as a cheaper option that wears down quickly may not be a cost-effective choice in the long run. Explore our recommendations across a range of snow tire categories.”

Winter tires are crucial for tackling challenging winter environments, focusing on providing exceptional grip on snowy and wet surfaces. While some tire designs employ metal studs to penetrate snow, our chosen options emphasize well-engineered tread patterns that effectively remove debris and ensure a secure trip home.Bridgestone’s Blizzak line is highly regarded for its superior winter tires, particularly the WS90 variant. These tires are manufactured using a specialized rubber compound that efficiently channels water away from the road. Additionally, they incorporate minuscule simulated studs that augment traction on icy road surfaces.”

Are you seeking snow tires that complement your vehicle? For trucks utilized in heavy-duty applications, it is imperative to assess the tire’s load index. The load index signifies the maximum weight the tire can accommodate, commencing with a load index of one, supporting 102 pounds, and ascending to 150, supporting 7,385 pounds.In the case of lifted trucks, the application of studded snow tires might be indispensable. Winterforce LT tires present the flexibility of usage with or without studs. Their directional tread pattern enables commendable traction even in the absence of studs. Furthermore, with an impressive load index of 125, they demonstrate remarkable carrying capacity.”

Are you more inclined towards speed rather than practicality? Search for a snow tire that aligns with your truck’s performance capabilities. While performance tires often come with a higher price, the resulting benefits justify the cost.

If speed is a paramount consideration, equip your truck with the same tires favored by enthusiasts for track-day events in their cars. Michelin PS4s were introduced as successors to the original Pilot Sport, boasting exceptional handling alongside an appealing aesthetic. This allure is accentuated by their sleek design, featuring a gracefully contoured shoulder section that seamlessly transitions from sidewall to a substantial, high-traction contact patch. (It’s essential to acknowledge that these tires are, indeed, all-season tires, demonstrating impressive performance in snowy conditions as well.)

September 22, 2023 0 comment
0 FacebookTwitterPinterestEmail
Utility Trailers

How to Repair a Punctured Tire

by auto_motivex September 22, 2023
written by auto_motivex

Introduction

Modern vehicle tires, renowned for their durability and resilience against challenging terrains and extensive mileage, are not impervious to damage. Periodically, car tires may develop leaks, causing air to escape. The location of these leaks determines the feasibility of a self-repair or the necessity of seeking professional assistance or even replacing the tire.

The type of tire, whether tubed or tubeless, also plays a crucial role, as only tubeless tires can be effectively repaired using the plugging technique outlined in this guide. Fortunately, contemporary vehicles are predominantly equipped with tubeless tires, rendering rubber plug repair a viable option.

However, the possibility of plugging a tubeless tire hinges on the puncture’s location within the tread area. If the air leak occurs where the tire’s sidewall meets the rim, commonly known as a “bead leak,” a visit to a mechanic with a tire machine is imperative. The tire needs to be dismounted from the rim and remounted with sealing liquid applied to the bead. In the event of sidewall punctures, a new tire is essential, as damage in this region could result in a hazardous blowout, particularly at high speeds, even after repair.

In this guide, we will elaborate on the precise steps involved in plugging a tire. Armed with this knowledge, you will be well-prepared to swiftly address tread punctures and resume your journey in no time.

The total time required to complete this repair is approximately 15 minutes. Opting for a DIY approach not only saves you around $20 but also eliminates the need to travel to an auto shop and endure wait times.


Tools Required

  • Car jack
  • Pliers
  • Spray bottle
  • Tire plugging kit
  • Wire cutters

Materials Required

  • Paper towels
  • Soap and water solution
  • Tire plug strips
  • Tire sealing cement

Locating the Leak

  1. Inflate the tire sufficiently to achieve firmness and resistance to finger pressure.
  2. Thoroughly inspect the tire to pinpoint the leak. Wheel removal is unnecessary for this step, but using a car jack to elevate the vehicle, relieving pressure on the tire for rotation, can be beneficial.
  3. If the leak’s location is not readily apparent, methodically spray the tire with a mixture of 20% soap and 80% water using a spray bottle. The emergence of consistent bubbles will indicate the leak’s precise location.
  4. Utilize pliers to remove any foreign objects such as nails, screws, staples, or loose metal that may be causing the leak.

Reaming the Hole

  1. Insert the T-handle reaming tool firmly into the hole and move it up and down while rotating to widen the hole and create a rough inner surface, preparing it for the plugging process.
  2. Remove the reaming tool and examine the hole. If it is not yet uniformly round, reinsert the reaming tool and repeat the up and down movement to achieve the desired shape.
  3. Occasionally, for very small holes, the reaming tool may not fit into the tire. In such cases, use a handheld drill with a bit slightly smaller than the reaming tool’s diameter. Enlarge the hole with the drill and then utilize the reamer to roughen the hole’s sides.
September 22, 2023 0 comment
0 FacebookTwitterPinterestEmail
Newer Posts
Older Posts

Recent Posts

  • Effective Cleaning Methods for Tonneau Covers
  • Approaches to Retain the Enchanting New – Car Fragrance
  • Optimal Car Trash Can Choices
  • Optimal Strategies for Cleaning and Maintaining Truck Running Boards
  • 环保型机油处理与回收

Recent Comments

  • Korey on What is the Recommended Frequency for Motorcycle Oil Changes?
  • Greg on What is the Recommended Frequency for Motorcycle Oil Changes?
  • Reye on Transporting Cargo with Pickup Trucks
  • mark on How to Properly Hook Up a Trailer?
  • marcus on What is the Recommended Frequency for Motorcycle Oil Changes?
  • Facebook
  • Twitter

@2020 - All Right Reserved. Designed and Developed by Auto-Motivex


Back To Top
Auto Motivex
  • Detailing
  • Motorcycle
  • Parts
  • Truck
  • Utility Trailers
  • Blog